
Video Tracks
The most obvious need for editing to picture is the addition of a video track where movies can be imported, placed, and viewed in the project. You can either create a blank video track and add video files to it later, or you can import a video file and the track will be automatically created for you. It is possible to have more than one video track in a single project.
Importing a Video File
Let’s start by importing a video file and let Nuendo automatically create a video track for you. Create a new, empty project and follow these steps with any compatible video file you have on hand:
1. Go to File > Import > Video File.
2. Navigate to a compatible video file and select it. The compatibility of any video file is greatly dependent on the type and configuration of your system. (See Figure 12.1.)
3. Before opening the video, decide whether or not you would also like to import any audio that is contained in the file. If so, check the box for Extract Audio From Video.
4. Press Open and a progress bar for audio extraction will appear if selected.
5. If you extract the audio from the video file, two tracks will be automatically created: a video track and an audio track. Both the video and audio events will be placed on these tracks at the cursor position. (See Figure 12.2.)
Caution It is a good idea at this time to either group the video and audio files together so they remain in sync or place them within a folder track and enable group editing to prevent their timing relationship from being accidentally altered.
Figure 12.1 Import Video dialog box.

Figure 12.2 Imported Video and Audio tracks.

6. Press F8 or choose Video Player from the Devices menu to open the Video Player window. This is where you will see the video images. You may also connect your computer to an external monitor, such as a large flat-panel TV or projection system via FireWire or other video processing hardware to view the images in a large format.
7. Press Play and watch to see that the video and audio are actually playing in perfect sync. Some video devices induce a processing delay in the chain and can cause sync issues between audio and video. This can be addressed by entering an offset in the Device Setup for the Video Player. (See Figure 12.3.)
Figure 12.3 Video Player Device Setup.

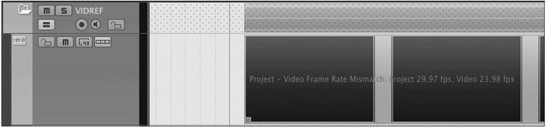
8. Ensure that Nuendo’s timecode settings are the same as the imported video frame rate. If they are not matched, this will be indicated in the video track by red text overlaying the video event. Both frame rates will be listed to help better diagnose the problem. (See Figure 12.4.)
Figure 12.4 Frame rate mismatch.
9. Ensure that the sample rate is running at the proper speed for the video. Usually, this is 48 kHz, the standard audio for video sample rate.
10. Place both the imported audio and video files at the appropriate location in the project, often at 01:00:00:00. Typically, one hour is a good starting point because it leaves room prior to the start of picture for calibration tones and for certain synchronization tasks. You can use absolute grid mode with the main ruler set to timecode and a grid value of one frame or one second. Turn snap on and move both files together to the desired location. You may also enter that value in the start field of the info line of the video file.
11. Play the video. Watch and listen to ensure that lip sync is accurate and the timing between the imported audio and video is correct. Common mistakes are operating at the wrong sample rate and timecode mismatches between the video and project settings.
Video tracks have much fewer options than other track types. They are as follows:
![]() Lock. As with other track types, pressing the Lock button will prevent any further editing of events contained on that track.
Lock. As with other track types, pressing the Lock button will prevent any further editing of events contained on that track.
![]() Mute. Pressing the Mute button for a video track will stop any playback of videos for that track and turn the video output to black.
Mute. Pressing the Mute button for a video track will stop any playback of videos for that track and turn the video output to black.
![]() Frame Numbers. Nuendo will display the frame number for each frame of video in the lower-left corner of each frame box in the track display when this is active.
Frame Numbers. Nuendo will display the frame number for each frame of video in the lower-left corner of each frame box in the track display when this is active.
![]() Frame Thumbnails. Each frame box will contain a thumbnail image of that video frame when this feature is on. (See Figure 12.5.)
Frame Thumbnails. Each frame box will contain a thumbnail image of that video frame when this feature is on. (See Figure 12.5.)
Figure 12.5 Video Track Controls.

Multiple Video Events
You may place more than one video on a video track. Just like audio and MIDI events, videos can be played in sequence on one video track, one after the other.
You may also create more than one video track. Multiple video events can be placed on all video tracks. However, unlike audio and MIDI events, only one video can be seen at a time. So when they overlap, only the video event on the bottommost track will be seen. (See Figure 12.6.)
Video events can be edited in a limited fashion by adjusting their start and end tabs, thereby trimming the video. Video events can be placed next to one another in the timeline for a basic form of video editing.
Figure 12.6 The bottom video track has playback priority.

This can be used to create a rough edit from raw footage or for other tasks such as sequencing permutations of TV spots for rapid editing and mixing in one project (covered later in this chapter). Multiple video tracks can contain various versions of a piece at the same time that can easily be switched in and out for editorial purposes.
Note Bear in mind that any video editing should only be used for reference as there is no professional method to output or deliver the results of video editing in Nuendo.