
The Project Window
The project window is the main edit window in Nuendo where most of the action takes place. In fact, you could do just about any type of editing and mixing in this window alone. It is configurable to meet your needs, only displaying the information you want and nothing more.
There are eight areas in the project window, seven of which are shown by default in Figure 3.4.
1. Toolbar
2. Status Line
3. Info Line
4. Inspector
5. Track List
6. Event Display
7. Ruler
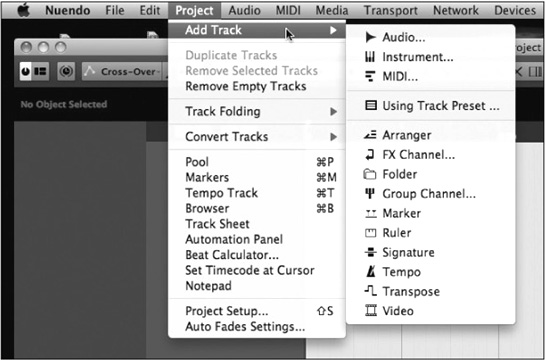
Figure 3.2 Add Audio Track configuration menu.

8. Setup Window Layout button
9. The Project Overview—This is not visible in Figure 3.4; it is one of the optional areas of the project window.
There are four areas of the display that are optional. You may turn them on or off to see more information or make more room in the window. To configure their visibility, press the Setup Window Layout button. The project window will gray out, revealing the display options available. (See Figure 3.5.) Many windows in Nuendo have this option. Just look for the same Setup Window Layout button in any window to see optional areas.
Figure 3.3 Project window with one audio and one MIDI track.

Figure 3.4 The project window.

Check the Overview Line and then click anywhere in the project window to return. A new line appears below the Status Line showing a white area in our example. If there was recorded material in the project, this line would show an overview of the entire project. This is useful for navigating very large projects such as feature film or long-form television. Figure 3.6 shows an example of the Overview Line in a music project. The gray area indicates the portion of the project that is visible in the Event Display at the current zoom level.
Figure 3.5 Setup Window Layout options.

Figure 3.6 Project Overview Line showing several tracks.

Project Toolbar
In its basic configuration, the toolbar contains a slew of editing tools and other controls for various functions. The toolbar is configurable to show just the items you wish to use. As each section deals with differing functions within Nuendo, they will be covered in detail in relevant sections of the book. Here, I will give brief descriptions of each to provide the general idea of what each tool can do. (See Figure 3.7.)
1. Activate Project—Think of this as a power button for the project. Since Nuendo can have more than one project open at a time, only one can be active. Pressing this button activates the project. The button is highlighted when the project is active.
2. Setup Window Layout—As discussed earlier in this chapter, this allows you to show or hide the four optional areas of the project window.
Figure 3.7 The toolbar with default controls.

3. Constrain Delay Compensation—This control defeats plug-ins that cause more delay than is set in the threshold setting for the plug-in in the mixing engine so that you may record new material into a project without any monitoring issues.
4. Automation Mode—This allows you to change the basic automation mode for Nuendo: Touch, Auto-Latch, or Cross-Over. These are just the very basic write modes of the automation system. Nuendo’s automation system is very sophisticated and will be covered in depth in Part IV, “Mixing.”
5. Auto-Scroll—This turns Auto-Scroll on or off, allowing the Event Display to follow the playback cursor as it moves through the project.
6. Transport—These are the basic transport controls. Complete transport controls are available from the Transport panel.
7. Auto-Fade—This activates Auto-Fade, which automatically creates a crossfade at edit points between audio events. Crossfades will be covered in Part III, “Editing.”
8. Editing Tools—These are all the editing tools for use in the Event Display. These buttons are used to select the various tools and to indicate which tool is currently active. Complete discussion of all the tools can be found in Part III, “Editing.”
9. Colors—Events and tracks can be colorized in the Event Display. The color choices are available from this pop-up menu.
10. Snap On/Off—This activates the snap function for editing in the Event Display. There are many uses for Snap, and they will be covered in Part III, “Editing.”
11. Snap Type—This determines the type of snap that is being used. There are eight choices for greater flexibility in editing.
12. Grid Type—When the grid is used for Snap editing, this defines the grid values. A complete discussion of the grid and its uses will be in Part III, “Editing.”
13. Quantization Setting—This gives you quick access to common quantization settings. Complete quantization tools are available from the MIDI Menu>Quantize Setup.
Those are just the default controls. By right-clicking (Windows) or Control-clicking (OS X), you will open a pop-up menu with all the available controls for the toolbar plus a Setup option to configure how they are displayed. Select the Setup… option to open the Toolbar Setup. (See Figure 3.8.)
Figure 3.8 Toolbar Setup dialog.

Certain controls are grouped together for display, such as Snap/Quantize. In the Setup dialog, you may select which controls are visible and in what order they appear on the toolbar. To make controls visible, select them in the right window and press the left arrow button to move them to the Visible side. Once there, you can select controls and either press the Move up or Move down buttons to change the order in which they appear in the toolbar.
Since these tools are things that are used literally hundreds of times per session, their configuration and position in the project window can be critically important to workflow efficiency and ease of use for you.
Once you have configured the toolbar to your preference, that setup can be saved as a preset using the preset tools at the bottom right of the dialog. You could create several presets designed for different types of work where tools that are most important can be put in convenient places on the toolbar.
Note This high degree of customization is available throughout Nuendo, accommodating a variety of workflow styles to match the needs of users. It takes some time to explore these possibilities and come to the right solution for your needs. The best advice is to work using the default settings and identify things you do most often. Then search for the most efficient shortcut or preference that will help speed up those operations one at a time. That way, the customization can be worked in gradually. This should yield the best working setup without being overwhelmed by the possibilities of all the customization.
I will provide examples of customization that have helped my workflow as starting points for you to create your own customized workspace and tools.
Customization—I tend to use the default settings for the toolbar minus hiding the automation mode as I use the Automation Panel exclusively. The other tools I use as a visual reference, since the display also indicates which tools are active and what their status is. For example, I can easily see which editing tool I am currently set to use. The transport tools quickly allow me to see if I am in Play or Record modes. I use key commands to switch tools and modes more often than clicking the buttons on the toolbar.
Alternate Toolbar Controls
There are eight hidden controls in the default Toolbar setup. (See Figure 3.9.) Following is a brief description of each of those tools:
Figure 3.9 Alternate Toolbar controls.

1. Media and Mixer Window—These buttons open mixer windows (Main mixer and Control Room mixer) and media management windows (the Pool and MediaBay).
2. Performance Meter—These two indicators show the status of the CPU and hard disk usage.
3. Network Controls—Nuendo can have multiple users editing one project over a network. These are the basic controls for activating and updating the network.
4. Nudge Palette—The nudge palette allows for controlled editing of events in the project. Nudging will be covered in Part III, “Editing.”
5. Left and Right Locators—The left and right locators are fundamental to many tasks in Nuendo. These tools are just one of many ways to utilize these important items.
6. Arranger Tools—The Arranger tool is a compositional tool used to quickly rearrange portions of a project to try out various arrangements of a song.
7. Project Root Key—The Project Root Key works with the Arranger tools to aid composition by allowing a global key change of the entire project.
8. Markers—An unlimited number of markers may be placed on multiple marker tracks in a project. These controls allow access to the first 10 markers on the active marker track.
The Status Line
The Status Line displays the basic settings from the Project Setup window. Clicking on the Info line will open the Project Setup in order to make changes. (See Figure 3.10.)
It is possible to change what is displayed in the Status Line in the same way you changed the display in the toolbar. Right-click (Windows) or Control-click (OS X) anywhere in the Status Line to access the Setup pop-up window and uncheck items you do not want to see. You may also use the Setup dialog to create presets for the Info line.
Available Record Time
The one added display is the available recording time as calculated by the audio format choices and the number of audio tracks in record. For example, if you have one mono audio track in record, the available record time could be many hours depending on the hard disk space. If you were to add a 5.1 audio track and place it in record, the available record time would diminish greatly because you added six additional channels.
This display will count down while you are recording to give you a real-time idea of how much space you have left on the hard disk. This can be an indispensable tool for live recording.
Tip If you click on the available record time, a larger floating display window will open that can be seen from across the room!
The Info Line
The Info line is a very powerful part of the project window interface. For every item or object in the Event Display, there are a series of details associated with that object. The details depend on what type of object it is, whether an audio event, MIDI note, or other. The Info line lists these details and allows you to edit them directly. Figure 3.11 shows the complete Info line for an audio event.
Figure 3.11 Audio event Info line.
The Info line for an audio event is one of the most complex because there are so many details for this type of event.
1. File Name—This is the actual name of the audio file recorded on disk from which this audio event comes. Changing this field will actually change the name of the file on the disk.
2. Description—This field allows for a unique description of this specific event. This information applies only to Nuendo and does not affect the audio file on disk. It will change the event’s name in the Event Display.
3. Start—This field shows the start time for the event. It will be displayed in the same format as the Ruler line. This can be changed at any time to represent the start time in another format such as SMPTE timecode or minutes and seconds. All the time-based fields in the Status Line reflect the format of the Project Ruler.
4. End—This field indicates where the event ends in time.
5. Length—This field indicates the amount of time between the start and end of the event. Editing this value will result in the End value changing.
6. Offset—This field indicates how far the visible audio is from the beginning of the actual audio file. It is related to Sizing Moves Contents editing mode and will be discussed in detail in Part III, “Editing.”
7. Snap—This field indicates where the Snap Point is located within the event. That will be the position that the Snap function will use to line up this event.
8. Fade-in—This field indicates the length of the fade-in for this event. Fades are calculated in real-time and are not rendered files like Pro Tools, so this value can be changed on the fly without any need to render a fade file.
9. Fade-out—This field indicates the length of the fade-out for this event.
10. Volume—This field indicates the gain adjustment applied to this event. With a range of +20 dB to -infinity, the gain adjustment is a simple and powerful way to adjust the volume of various audio events before they enter Nuendo’s mixer, perfect for vocal comping.
11. Lock—Various elements of an audio event can be locked from further editing. This field indicates what they are, and they can be edited directly here.
12. Transpose—This field allows an audio event to be pitch shifted to follow musical key changes, in half-step increments.
13. Fine-Tune—This field allows you to apply pitch shifting in amounts as little as 1 cent. (100 cents = 1 semi-tone.)
14. Global Transpose—This field determines if this audio event will follow any global transpositions or if it is independently transposed.
15. Root Key—This field determines what the root key of this audio event is, which will affect how it reacts to global key changes.
16. Mute—This field indicates whether this audio event is muted or not.
As a comparison, Figure 3.12 shows the Info line for a single MIDI note. Info lines are different for all objects in the Event Display. As each object is discussed, the Info line will be referenced for changing various aspects and behavior of those items.
Figure 3.12 MIDI event Info line.
The Ruler Line
The Ruler line displays time in several formats. The format of the Ruler line is also used to display time in many other fields within Nuendo. Changing this format will change how data is displayed in all these other places such as the Info line. Changing the Ruler line to display Timecode will cause all the time-based fields in the Info line to show timecode values. This also affects things like the grid values for the Snap function and much more.
To change the Ruler line format, right-click (Windows) or Control-click (OS X) to access the time format pop-up menu. Choose from one of the seven possible time formats. (See Figure 3.13.)
Figure 3.13 Time format pop-up menu.

Ruler Timebase
The other option available in this menu is how time is scaled in the ruler. This relates to tempo changes and how they are displayed. For example, if the tempo changes from 120 bpm to 80 bpm, how will that be shown in the ruler? Will the beats be farther apart? Will timecode frames be closer together after the tempo change? It depends on how time is scaled in the ruler.
If this option is set to the default Time Linear mode, musical bar indicators will be spread out further when the tempo is 80 bpm to match the slowdown in tempo. If this is set to Bars+Beats Linear, bar indicators would remain at the same distance from each other, while timecode values would be placed closer to each other.
This can be most helpful in scoring to picture as drastic tempo changes can make it hard to edit musical events if they are placed too close together or too far apart. Bars+Beats Linear keeps them the same distance from each other regardless of tempo.
The Inspector
The Inspector displays all relevant controls for the selected track in the track list. Each track type has a unique set of controls. Controls are grouped into expandable tabs so that you can look at only the controls you are focused on. A lot of information and controls are contained in the Inspector, so the ability to show or hide sections of it is very useful. Figure 3.14 shows the Inspector for both an audio and a MIDI track. By default, the Inspector starts with only the top tab open. As there is no name for this tab, we shall call it the main tab.
Figure 3.14 The Inspector for an Audio and a MIDI track with the main tab open.

The main tab contains a condensed set of controls that covers many basic functions. At the top is the name of the track and what number it is in the track list. You can click here and change the name of the track. The little triangle icon accesses the color palette for that track. The “e” button opens up the Edit Channel Settings window, which is discussed later in this chapter. And that’s about all that is shared between the two different track types, audio and MIDI.
Audio Track Inspector
There are a total of 12 possible tabs for an audio track. By default, only 6 are displayed, but all 12 are available and may be grouped in presets for various types of working methods. Just like the toolbar, the Inspector has the same type of customization dialog box as shown in Figure 3.15. You can access this Setup dialog box by right-clicking (Windows) or Control-clicking (OS X) anywhere in the Inspector.
Figure 3.15 Inspector Setup dialog box.

The following is a breakdown of all the Inspector tabs for an Audio track.
The Main Tab
The main tab, shown in Figure 3.16, contains a blend of controls that affect editing and mixing. It is the most complex of all the tabs. The controls are duplicated in several other places in the GUI as are most things in Nuendo, giving you more versatile access to the things you use most.
1. Track Name—Name of the track.
2. Track Number—Number of the track in the track list. Moving tracks up or down in the track list will change this number.
3. Mute—Mutes this track just like on any mixer. There is a duplicate of the same button on the Mixer.
Figure 3.16 The main Inspector tab for an audio track.

4. Solo—This solos the track using the Solo-In-Place method, which mutes all other tracks as a result.
5. Automation Read—Enables automation reading.
6. Automation Write—Enables automation writing.
7. Record Enable—This places the audio track in record-ready.
8. Monitor—Enabling Monitor allows audio from the input to pass through the channel for monitoring purposes. This can automatically be enabled when Record is enabled via a preference setting. Complete details can be found in Part II, “Recording.”
9. Timebase Toggle—Audio tracks can reference a linear timebase (default) or musical (bars+beats) timebase that will follow tempo changes, time-stretching the audio accordingly. In Linear mode, audio will always play back at the same speed regardless of tempo changes.
Caution I have encountered clients who have been recording at home and unknowingly set audio tracks to musical timebase. Sometimes this happens in Cubase. Any tempo changes applied to the project cause time-stretching of all audio files on these tracks. While the algorithms that do this work quite well given the task, the sound quality suffers and confusing timing changes will occur if this is not intended. Always double-check the timebase on audio tracks when changing tempos and avoid this problem.
10. Edit Channel Settings—This opens the Edit Channel Settings window, described in Chapter 4, “Nuendo’s Extended Layout.”
11. Color Tab—Allows you to select a color for events on this track and for the track name label.
12. Device Panel—Opens the Device Panel editor for this track. Device Panels are the same as MIDI device panels where you can create a custom set of controls for this track.
13. Auto-Fade Setting—This button opens the auto-fade dialog to turn auto-fades on or off and make adjustments to them. This is covered in Part III, “Editing.”
14. Lock—Enabling lock on an audio track prevents any further editing of audio events in the Event Display.
15. Freeze—This button invokes the Freeze function, which effectively records the processed audio through the channel to disk and disables all plug-ins to conserve DSP resources. Complete information on freezing tracks is in Part IV, “Mixing.”
16. Lane Display Type—This pop-up enables the use of recording “lanes,” which allow multiple takes of audio to be “stacked” on one track. The lanes can then be compiled (comped) into a finished performance by editing. Lanes are covered in Part II, “Recording,” and Part III, “Editing.”
17. Channel Fader—This horizontally oriented slider is the main channel volume fader. It operates just like its larger counterpart in the mixer.
18. Channel Pan—This panner operates just like the pan in the mixer. There are three stereo modes that are covered in Part IV, “Mixing.”
19. Track Delay—Don’t let the name fool you. This control can not only delay the signal through the channel, but negative settings will cause the signal to arrive earlier, which is very handy for phase adjusting multiple microphones on a single source. Use Shift when adjusting to get fine resolution of less than 1 ms.
20. Input Selection—This pull-down menu lists all available inputs, including Control Room External Inputs, as recording sources. The channel width of the input must match that of the audio track in order for it to be available. Child buses can be an answer to this, and mono channels of any group are available to mono audio tracks. For example, a stereo audio track cannot record from a mono or 5.1 input.
21. Output Selection—This pull-down menu allows you to select the main output channel for this track. All FX channels, group channels, and VST Output buses are available as outputs regardless of channel width because Nuendo handles downmixing automatically and uses a panner when the output width is larger than the track width.
22. Automation Mode—You can set the audio track to follow the global automation mode or set it independently using this pull-down menu.
23. Preset Management—You can save all the current settings for this channel as a preset. It is possible to attach attributes to help categorize presets: vocal, drums, etc. You can create huge libraries of presets that can be easily searched.
24. Track Preset Menu—This small icon opens up a powerful media browser to help you search for track presets, audition them, and then load them into the track. (See Figure 3.17.)
25. Reload Preset—If you load a preset and then adjust some controls, you may reload that preset to revert to its original settings.
Figure 3.17 Load Track Preset browser with attribute search.

Note Wherever you see the Preset Management icon, shown in Figure 3.18, you will have access to the preset browser. This icon appears in many areas of Nuendo and is a global tool you can recognize.
Figure 3.18 Preset Management Global icon.
Inserts Tab
Here’s where so much of the fun lies: inserts, plug-ins, all the toys we use to manipulate and process audio. Each channel in Nuendo has eight inserts: six pre-fader and two post-fader. The Inserts tab (Figure 3.19) allows you to choose inserts for each slot, open plug-in GUIs for editing, disable or bypass inserts, and save or recall groups of inserts and their settings as presets.
Figure 3.19 Audio Track Inspector Inserts tab with one loaded insert.

1. Insert tab expansion toggle—Clicking on the name of the tab causes that tab to open and all other tabs to collapse, leaving you with just the information you are working with. It is possible to have more than one tab open at a time, but in the Inspector, things get crowded quickly.
2. Insert Activation—For each insert there is this activation button. Consider this a “power” switch as it turns the insert on or off. This is more than a bypass because the DSP is not active when off, and turning it back on will disrupt playback.
3. Insert Bypass—This is a true bypass button for the insert that can be used in real-time or with automation to bypass an insert.
4. Select Insert Menu—Clicking in this area brings up the Insert Selection menu, offering all the available plug-ins in your system. May your list be long and mighty!
5. Insert Preset Management—This preset browser is for managing individual insert presets.
6. Edit Insert—This opens the insert’s GUI for editing. It will turn blue when the insert’s GUI is open even if it is not visible as the frontmost window. You can have many insert GUI windows open at same time.
7. Master Insert Bypass Indicator—This button appears blue when there are active inserts on the track. Clicking on it will bypass all inserts and will turn it yellow. It appears gray when there are no inserts loaded.
8. Inserts Preset Management—Opens the preset management browser for inserts. These presets are for chains of plug-ins, not just one at a time. If you have created the ultimate bass tone using several plug-ins, you can save the whole thing as a preset here.
Equalizers Tab
Every Nuendo audio channel has a built-in equalizer that is quite capable. With a choice of filter types and full parametric control for each of the four bands, you have a great deal of tonal shaping ability right from the start on every channel. (See Figure 3.20.)
Figure 3.20 Inspector Equalizers tab with one band active.

1. Equalizers tab expansion toggle—Open and close Equalizers tab.
2. Invert EQ Curve—This is a very useful function to check how your EQ curve is working. Pressing this button causes the entire equalizer curve to invert its shape, boosting what was cut and cutting what was boosted. This can be a real eye-opener sometimes.
3. Equalization Curve Display—This provides a graphic representation of the EQ curve and can also be used to edit each band by dragging the numbered EQ points around in the display.
4. Band Activation—For each EQ band there is an activation button. This can be used in real-time or with automation to bypass each band.
5. Gain—You can move the slider or enter a number in dB to the gain field.
6. Frequency—Move the slider or enter a frequency in Hz. Each band has the full range of frequencies, 20 Hz to 20 kHz.
7. Filter Type Pull-down Menu—Since the addition of VST 3 plug-ins, the Nuendo equalizer has several filter types to choose from. The original EQs from earlier versions are labeled type I. The newer filters are II, III, and IV. For band 1, there are parametric, high shelving, and low pass filters (LPF). For bands 2 and 3, there are parametric only, and for band 4, there are parametric, low shelving, and high pass filters (HPF). (See Figure 3.21.)
8. Q or Bandwidth—Adjust the slider or enter a Q value in the field to control the bandwidth or slope of the EQ filter. Try using this control on Shelving II, III, and IV or with HPF/LPF II!
9. Band Invert—This button inverts only the single band.
10. Master Equalizers Bypass Indicator—This button appears green when there are active bands in the equalizer. Clicking on it will bypass all bands, and it will turn yellow. It appears gray when there are no active bands.
11. Equalizers Preset Management—Opens the preset management browser for equalizers.
Figure 3.21 Filter type pull-down menu for band 1.

Sends Tab
Every audio channel in Nuendo has eight available auxiliary sends. They can be used for a variety of things including sending signals to effects channels such as reverb, routing signals to other channels for parallel or alternate processing, or routing signals to outputs of the mixer for external use. (See Figure 3.22.) The possibilities are endless and much will be discussed in Part IV, “Mixing,” about creative use of sends.
Figure 3.22 The Sends tab with one active send to a reverb FX channel.

1. Sends Tab Expansion Toggle—Open and close Sends tab.
2. Master Sends Bypass Indicator—This button appears blue when there are active sends. Clicking on it will bypass all sends, and it will turn yellow. It appears gray when there are no active sends.
3. Send Activation—For each send there is an activation button. This can be used in realtime or with automation to enable or disable the send.
4. Pre/Post Fader—This determines where the signal for the send is derived in the signal flow of the channel. Gray = post-fader; yellow = pre-fader.
5. Edit FX Channel Insert—If the send is routed to an FX channel, this button will open the first insert on that FX channel for editing. This is just a quick shortcut to the plug-in GUI and is very convenient. It will be grayed out if the destination is not an FX channel.
6. Send Destination Select—This pull-down menu will show all available destinations for this send. They could include FX channels, group channels, VST outputs, and even side-chain inputs to certain VST 3 plug-ins.
7. Send Level—You can move the slider or enter a number in dB to the level field.
Note Sends also have a pan control if the destination has more than one channel. This is not visible in the Inspector but can be accessed in the Edit Channel Settings window discussed in Chapter 4, “Nuendo’s Extended Layout.”
Channel Tab
The Channel tab for an audio track has tools similar to those found in the main tab, plus some others, all in a new constellation that comes in more handy for mixing than the main tab. So much of the user interface in Nuendo is about the ever-changing needs of working in a studio situation, constantly switching tasks from recording to editing to mixing. You will find that having these duplicate controls in various locations throughout the GUI can be very helpful. (See Figure 3.23.)
Figure 3.23 Audio track’s Channel tab.

1. Channel Tab Expansion Toggle—Open and close the Channel tab.
2. Inserts Activation—This display shows the status of inserts 1–8. If the number is blue, there is an active insert in that slot. Clicking on the number will cause it to turn gray, and the insert will be deactivated (the power switch is turned off).
4. Listen Enable—Routes this channel to the dedicated listen bus for AFL/PFL monitoring in the Control Room.
5. Automation Read/Write
6. Equalizer Band Activation—These are the status indicators for the four EQ bands. Clicking on them will turn those bands on or off.
7. Sends Activation—These are the same status indicators for the eight sends. Clicking on them will turn the send on or off.
8. Track Name—You can edit the track name by double-clicking in this field.
9. Numeric Level Display—The bottom number is the gain value of the channel fader. The smaller top number is the peak level value for audio signals. Metering will be discussed in depth in Part II, “Recording.”
10. Record and Monitor Buttons
11. Master Bypasses—The master bypasses for inserts, equalizers, and sends.
12. Channel Meter—Displays the signal level for this channel.
13. Edit Channel Settings—Opens the Edit Channels Settings window.
14. Channel Fader—Controls the overall level of the audio signal to the mix.
15. Channel Panner—Adjusts the position of the signal between mix channels.
Notepad Tab
One of my favorite tabs is the Notepad tab, shown in Figure 3.24, as it allows you to jot down notes about this track. I use them to document recording techniques used for a particular sound, such as the type of guitar and amplifier used, microphone choice, mic preamp, compressor, etc. These notes are saved with the project file and are helpful for recalling settings on outboard equipment and many other things. The Notepad icon is blue if any text is written there.
Note There is a Project Notepad available from the Project menu. It’s a great place to paste the lyrics to a song.
Quick Controls Tab
Quick Controls are just what they sound like, controls that let you get at what you really need right away. These are customizable controls that can consist of any combination of available parameters. I have created some Quick Controls in Figure 3.25, including the threshold setting from the compressor on insert 1. The automation read and write controls are already there, so you can write automation with these parameters right away.

Figure 3.25 The Quick Controls tab.

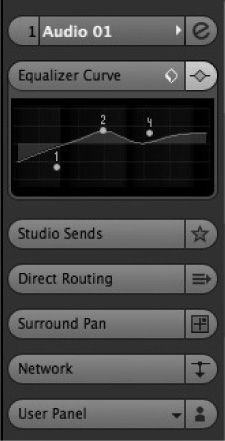
Equalizer Curve Tab
After the six default tabs, there are six more alternate tabs, one of which is the Equalizer Curve tab, shown in Figure 3.26. The purpose of this tab is to provide access to the equalizer controls in a smaller package. Since you can manipulate some of the EQ controls right in the display, this tab gives you the basic functionality of the EQ. Just click anywhere in the display to add a band.
Figure 3.26 The Equalizer Curve tab.
Studio Sends Tab
The Studio Sends are specialized auxiliary sends used in conjunction with the Control Room for creating cue sends for performers to monitor during recording. There are four possible Studio Sends. (See Figure 3.27.) Only the ones that have been defined in VST Connections will be available in this tab. Use of the Studio Sends will be covered in Part II, “Recording.”
Direct Routing Tab
The Direct Routing function in Nuendo is primarily intended for film mixing but has applications in music mixing and live broadcast as well. When more than one VST output is defined, direct routing can be used to send a channel’s output to one or more of those outputs (up to eight) with a simple click. This function can be automated, and the signal can be routed to more than one output at a time. (See Figure 3.28.) This function will be explored in more detail in Part IV, “Mixing.”
Surround Pan Tab
When a channel is routed to a multi-channel bus such as a 5.1 surround bus, Nuendo’s surround panner is invoked, and this tab provides quick access to a basic joystick control of the panner. (See Figure 3.29.) Double-clicking on the panner opens up the complete Surround Panner V5 interface that will be discussed in depth in Part IV, “Mixing.”
Figure 3.27 The Studio Sends tab.

Figure 3.28 The Direct Routing tab.

Figure 3.29 The Surround Pan tab.

Network Tab
The Network tab, shown in Figure 3.30, provides access to the network settings for this audio track. Network settings can vary from track to track, allowing access by only certain network users to specific tracks in the project.

User Panel Tab
In this tab, MIDI control user panels can be displayed for devices associated with this track. This could be an externally controlled MIDI device or simply a few select parameters from an internal VSTi. User panels for the Inspector should be formatted to fit the limited space and fixed width of the Inspector.
MIDI Track Inspector
The MIDI track has a very different type of Inspector since it deals with a completely different type of data than an audio track. Many of the controls are the same and function in a similar manner to their audio counterparts, but there are also plenty of MIDI-specific controls to take a look at. Unless otherwise noted, controls work the same as for audio tracks.
MIDI Main Tab
The MIDI Main tab, shown in Figure 3.31, looks very similar to the audio main tab with some notable exceptions, including the presence of MIDI channel assignments and program patch fields.
Figure 3.31 The MIDI Main tab.

1. Track Preset Management—Works the same as for audio tracks.
2. Track Name, Color and Edit Channel Settings
3. Mute and Solo
4. Timebase, Lock and Lane Display
5. MIDI Input Transformer—This button opens a powerful tool for filtering and transforming incoming MIDI data as it is being recorded, allowing for creative use of MIDI controller data. Imagine mapping aftertouch to breath controller while you record.
6. Record Enable and Monitor Status
7. MIDI Volume—This slider looks like the audio volume control but is actually sending MIDI volume controller data to the output destination.
8. MIDI Pan—This is a MIDI pan controller and is not the same as audio pan.
9. Track Delay—The MIDI track delay works in the same fashion as the audio track delay, allowing you sub-millisecond time shifting of elements on this track.
10. Input Selection—Works the same, just for MIDI inputs only.
11. Output Selection—Works the same, but only to MIDI devices.
12. MIDI Channel—Defines the MIDI channel on which data will be transmitted.
13. Edit Instrument—Opens the VSTi editor or a device panel for an external device that the MIDI track is routed to.
14. MIDI Program—This allows direct access to programs stored in the connected VSTi or MIDI device. You can change programs remotely in order to audition various sounds or patches.
MIDI Inserts Tab
MIDI tracks can also use processing inserts in much the same way as audio tracks. MIDI inserts process the MIDI data as opposed to audio data for plug-ins. MIDI inserts include things like arppegiators, MIDI echo, and quanitizer. The MIDI Inserts tab operates in the same way as for audio tracks. The controls will be familiar. There are only four MIDI inserts per track.
MIDI Fader Tab
Similar to the Audio Channel tab, the MIDI Fader has controls for record enabling, mute, solo, and automation. However, these controls only affect MIDI data, not audio. (See Figure 3.32.)
MIDI Notepad
This is another notepad just like the one for audio tracks.
Note All tracks have the same Notepad tab except specialized tracks such as ruler tracks and marker tracks.
Figure 3.32 The MIDI Fader tab

MIDI Quick Controls Tab
Some specialized tools are available for MIDI Quick Controls such as the transpose and modulation controllers. When you create a custom set of Quick Controls, you may save the entire setup as a track preset using the tools at the top of the Inspector. (See Figure 3.33.)
Figure 3.33 MIDI Quick Controls tab with some MIDI controls.

MIDI Instrument Tab
In order to give you immediate access to the audio associated with this MIDI track, there is the MIDI Instrument tab. This tab provides direct access to the audio settings for the VSTi or External Instrument that MIDI track is routed to. Clicking on the tab’s name reveals more tabs from that VSTi track. This makes for fast editing of sounds and rough mixing while working with MIDI tracks.
In this example, the MIDI track is assigned to an instance of Groove Agent. In Figure 3.34, the MIDI Instrument tab is opened, and the Audio Fader tab for Groove Agent has been opened, gaining access to the actual audio level of the VSTi.
Figure 3.34 The MIDI Instrument tab.

MIDI Modifiers Tab
This tab (and those that follow) is not in the default view of the MIDI track Inspector. In order to see this tab, you must right-click (Windows) or Control-click (OS X) in the Inspector and check MIDI Modifiers in the visible list.
The MIDI Modifiers tab, shown in Figure 3.35, provides a way to manipulate or modify the playback of MIDI data by transposing the notes, changing velocity and timing, or randomizing aspects of each MIDI note.
Figure 3.35 The MIDI Modifiers tab.

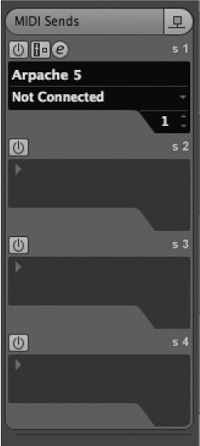
MIDI Sends Tab
MIDI sends work in the same way as audio sends except that the destination for a MIDI send must be a MIDI device such as a VSTi or External Instrument. They do not have a level control, but MIDI effects can be applied to the sent data. (See Figure 3.36.)
Figure 3.36 The MIDI Sends tab.
MIDI Network and User Panel Tabs
These tabs function in exactly the same way as audio tracks.
Clarified Terminology Steinberg uses certain terms that could lead to some confusion, especially when you’re first becoming familiar with its software. Most of this terminology is based on industry-standard words, but some have overlapping meanings and should be clarified at this point.
![]() Event—An event is anything that can be played back in Nuendo, be it audio, MIDI, video, automation, or tempo change. You could think of it like this: “Anything that happens in a project is considered an event.” The chunks of audio in the project window are called audio events, while the point at which the tempo map changes is called a Tempo Change event, each MIDI note is a MIDI event, and so on. This is fundamental to the way Nuendo and Cubase are described in their documentation and in this book.
Event—An event is anything that can be played back in Nuendo, be it audio, MIDI, video, automation, or tempo change. You could think of it like this: “Anything that happens in a project is considered an event.” The chunks of audio in the project window are called audio events, while the point at which the tempo map changes is called a Tempo Change event, each MIDI note is a MIDI event, and so on. This is fundamental to the way Nuendo and Cubase are described in their documentation and in this book.
![]() Track—A track traditionally referred to a tape machine track where audio could be recorded. In Nuendo, a track refers to any display of information on the track list and in the Event Display that can change over time or be recorded in real-time. For example, automation data will occupy a track in Nuendo since it can be changed over time. Tempo can be changed, so it too will occupy a track. Even markers can change over time. Hence, there is a marker track.
Track—A track traditionally referred to a tape machine track where audio could be recorded. In Nuendo, a track refers to any display of information on the track list and in the Event Display that can change over time or be recorded in real-time. For example, automation data will occupy a track in Nuendo since it can be changed over time. Tempo can be changed, so it too will occupy a track. Even markers can change over time. Hence, there is a marker track.
![]() Channel—A channel refers to anything that will be displayed in Nuendo’s mixer. Every channel has a fader that adjusts the volume of some signal, whether it be audio or MIDI. Since all channels can be automated, they will have some sort of representation in a track. For example, a group channel track is the representation of a group channel from the mixer in the track list and Event Display area showing automation data for that channel. A folder track does not have a corresponding folder channel since there is no signal to control for a folder.
Channel—A channel refers to anything that will be displayed in Nuendo’s mixer. Every channel has a fader that adjusts the volume of some signal, whether it be audio or MIDI. Since all channels can be automated, they will have some sort of representation in a track. For example, a group channel track is the representation of a group channel from the mixer in the track list and Event Display area showing automation data for that channel. A folder track does not have a corresponding folder channel since there is no signal to control for a folder.
![]() Bus—A bus is defined as a signal path where more than one signal can be combined together, hence the terms mix bus or group bus. This is a standard audio term that is often overlooked for what it is: Buses are often referred to as paths that take a signal to some destination, such as a recording track or effects unit. While that is true, any audio path can take a signal to some destination, but what makes a bus unique is the ability to combine or mix signals together.
Bus—A bus is defined as a signal path where more than one signal can be combined together, hence the terms mix bus or group bus. This is a standard audio term that is often overlooked for what it is: Buses are often referred to as paths that take a signal to some destination, such as a recording track or effects unit. While that is true, any audio path can take a signal to some destination, but what makes a bus unique is the ability to combine or mix signals together.
Note Steinberg’s VST Inputs are not technically a bus since you cannot combine multiple inputs together in any way. Other signals cannot be combined on a VST Input except through the use of an external bus before the signal enters Nuendo. Otherwise, the term bus is used properly in Nuendo. I will still refer to the VST Inputs as buses to remain with Steinberg’s conventions.
The Track List
Right next to the Inspector is the track list where every track in the project is displayed. A variety of controls can be accessed here along with the ability to resize and re-order tracks. There are 13 types of tracks that can be added to a project, and each one has its own default settings for what is visible in the track list. Figure 3.37 shows the track list with one of each type of track displayed with their default controls.
Figure 3.37 Track list with all types.

1. Audio Track—Record, edit, and play back audio events.
2. MIDI Track—Record, edit, and play back MIDI data.
3. Instrument Track—Same as MIDI track with the addition of one VSTi plug-in and all associated audio controls. The VSTi on this track cannot accept MIDI input from any other MIDI track. See the VSTi Channel entry later in this list.
4. Folder Track—Folder tracks are merely containers for other tracks. They are very helpful in organizing a large number of tracks. Related tracks of any sort may be placed in a folder track. The folder track can be closed to hide these tracks from the track list.
5. Group Channel Track—Group channel tracks are audio buses used to process and mix combinations of audio signals from other tracks in the project. For example, you would use a group channel to bus a bunch of background vocals together in order to process them as a whole (EQ, compress, etc.) and mix them back in with the rest of the music.
6. FX Channel Track—This track type is almost exactly like a group channel track except that the Add Track dialog box allows you to choose a plug-in for the first insert slot. Typically, auxiliary sends (aux sends) would be routed to FX channels for the purposes of generating reverb, etc. In the routing pull-down menus, FX channels have their own submenu area for easier routing at the top of the destination list. Also, newly created channels can have their aux sends pre-configured to FX channels as a preference. Their controls are identical to group channels.
7. Marker Track—As the name implies, marker tracks are used to place identification points along the timeline of the project. Markers can be single points or a range of time called a Cycle Marker. You may have multiple marker tracks in one project, very handy for film work and cue sheets.
8. Ruler Track—A ruler track is used to represent time in various formats along the Event Display. In addition to the ruler at the top of the Event Display, you may place multiple ruler tracks at any point within the track list.
9. Video Track—Video tracks are for placing video files as video events in the timeline of a project. Video events can be edited just like other events.
10. Tempo Track—Every project contains a tempo track. Creating this track in the track list just allows you to view the information right in the Event Display. Tempo change events can be edited directly in the Event Display. By default, there is always one tempo event at the very start of the project.
11. Time Signature Track—Changing the time signature alters how many beats there are per bar and the value each beat has. This track displays any time signature events. By default, there is always one time signature event at the very start of the project.
12. Transpose Track—This track type displays any transpose events that occur in the project.
13. VST Input Channel Track—It is possible to create a VST input channel track by recording automation using the mixer on a VST input channel. Only then will a track be created in the track list to display those automation events.
14. VST Output Channel Track—The same is true for automation written for a VST output channel. Writing automation with that output channel in the mixer causes a VST output channel track to be created in the track list.
15. VSTi Channel—Virtual Instruments may be loaded as a standalone track (unlike Instrument Tracks) so that multiple MIDI tracks can then be routed to the one VSTi. Multitimbral VSTis (those that can accept more than one MIDI channel) must be used this way.
16. Signal Meters—Every track that passes either an audio or MIDI signal has a meter associated with it. For MIDI, the signal meter displays the velocity level of notes and a fixed level for continuous controller data.
The specific details and controls for each type of track will be discussed when their use comes up during the course of this book. Many of the functions are redundant to audio and MIDI tracks while others are specific to one type: Marker, Tempo, etc. The purpose here is to provide an overview of all the possibilities.
Track Control Settings
In the track list, various controls for each track type are displayed. By default, not all available controls are shown. In order to configure which controls are visible in the track list, right-click (Windows) or Control-click (OS X) on a track in the track list and choose Track Control Settings from the pop-up menu. (See Figure 3.38.) This will open the Track Control Settings dialog box that should be familiar after seeing the Inspector and Toolbar Setup dialog boxes.
Figure 3.38 Track Control Settings pop-up menu for track type.
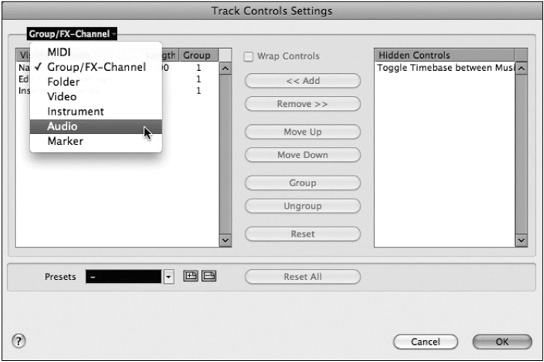
Select the track type from the pop-up menu, and you can then rearrange the controls to show only the desired controls in the order you prefer. These settings may be stored as a preset for later recall. You may enter the number of characters in the length field to determine how many characters of the track name will be shown before being cut off in the display.
Track Control Grouping and Wrapping Display
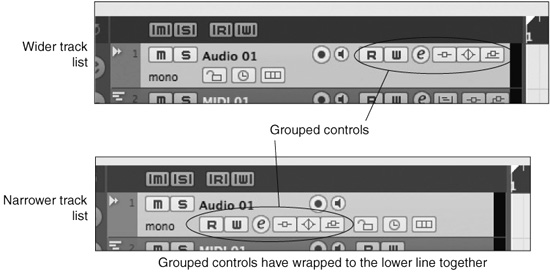
The Wrap Controls option is active by default, causing the controls in the track list to wrap down to another line as the track list is narrowed. In order to narrow or widen the track list, position the mouse cursor over the line separating the track list from the Event Display until the cursor turns into a separation icon. Then click and drag the divider between the two areas to resize them. Tracks with wrap enabled will move groups of controls around as space for them changes.
You can control how this wrapping occurs by grouping controls together so they wrap as one element. For example, if you group the Read/Write Enable, Edit Channel Settings, and Inserts/EQs/Sends controls together in the track controls settings for audio tracks, narrowing the track list causes all three sets of controls to wrap to the second line together, as seen in Figure 3.39.
Figure 3.39 Wrapping of grouped controls in the track list.
Deep Customization Nuendo offers an incredibly deep amount of customization that might seem daunting at first, and for first-time users, it is. Just about every function in Nuendo has some form of customization available, whether that be a key command or a preference to adjust how the program responds. Every command in Nuendo has the ability to be assigned to a key command. Macros can be made to perform a series of commands all at once. The list goes on and on.
I could not imagine any one user actually using all of this customization. But that’s really the point. The customization is there because everyone works differently and needs to perform different tasks that require specific tools and workflows. Nuendo gives you the flexibility to create custom workspaces and toolsets to meet just about any need.
However, if you are a first-time user or new to Nuendo, just start with all the default settings, which should get you through most tasks quite easily. These have been very well thought out. After using the software for a while, you will inevitably find some tasks that you perform often that are repetitive or not convenient in the default configuration. Then to improve your efficiency, explore the possibility of creating a key command or reconfiguring how the controls appear.
Many of these controls are things you could easily use thousands of times a day. The ability to precisely position and configure them can save hours of valuable time in the long run. Customization at this deep level should be taken one step at a time to be effective, in my opinion. The possibilities are endless.
Event Display
The Event Display, shown in Figure 3.40, is the main editing area of Nuendo. It is here that so much of the work is done. Every type of event in Nuendo can be represented here. Other items in the Event Display include viewing options (zoom, scroll, etc.) and navigation tools as described later in this section.
Figure 3.40 The Event Display showing all possible event types.

1. Cursor—The playback cursor is a vertical line that lies across the entire Event Display area. It marks where the transport is located in time. When Nuendo is in play, the cursor will move across the Event Display indicating its current position.
2. Audio Event—Audio events are portions of audio files that will be played back at certain points on the time line.
3. MIDI Events—MIDI events consist of notes and controller data that are played back on the timeline.
4. Automation Events—Automation events are points on the timeline where an automated control has reached a certain value. Automation data changes smoothly between these individual events to make up complex automation curves.
5. Marker Events—Both Markers and Cycle Markers are events that reside on marker tracks.
6. Video Events—Video events are portions of video files that play back at certain times in the project.
7. Tempo Events—Tempo events mark when the tempo of the project changes. This can happen suddenly with a jump or gradually over time.
8. Time Signature Events—Time signature events mark when the time signature of the project changes.
9. Transpose Events—Transpose events mark when the global key of the project changes either up or down.
10. Horizontal Scroll Bar—This scroll bar can be used to navigate the timeline of a project. Slide the block left to move earlier in time or right to move later in time.
11. Zoom Tools—These sliders adjust the horizontal and vertical zoom level for the Event Display. Pop-up menus give you other choices for the zoom level such as Zoom to Selected or Zoom to Full.
12. Vertical Scroll Bar—Sliding this scroll bar will move the Event Display up or down to show tracks that do not fit in the current window size.
13. Event Height—This slider increases or decreases the height of events in the display. For example, turning this slider up will cause audio waveforms to be taller/thicker in order to provide more accurate editing of quiet signals.
14. MIDI Part—A MIDI part is a collection of more than one MIDI event in a container so that all the events within the part can be moved and edited as one unit. This can be used to create musical parts such as “Verse Bass Part,” for example. It becomes much easier to copy the bass part to other sections of a song.
15. Audio Part—An audio part is the same structure as a MIDI part, only with audio events instead of MIDI events. You can also create the “Verse Bass Part” out of audio events that you’ve edited together to create a performance of the bass. Now, the entire bass part can be moved or copied easily.
16. Left and Right Locators—The left and right locators are very important tools in Nuendo. They are very useful for editing, mixing, navigation, and even recording in cycle mode.
That about covers all the GUI elements and layout of the project window. While there is still so much to explore in functionality of the project window, this section was designed to give you an overview of all the things that are happening here.