
Working with Text
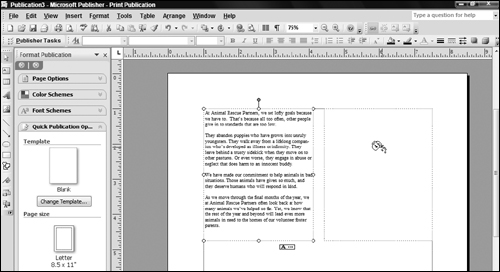
In Publisher, you add text into a text box. A text box has a dashed boundary that defines where the text will appear. If you created your publication from a template, the template design provided placeholder text boxes within the publication, as in the example shown in Figure 31-6. In that case, you can simply use an existing text box to add the text. You also can create your own text boxes as required for your publication design.
Typing text in a placeholder
Adding text into a placeholder text box requires that you select the placeholder and the text within the placeholder to replace the example text. Use these steps to add text into a placeholder text box in a file based on a template:
1. | Click the text within the placeholder. In most cases, this action selects both the text box and all the placeholder text within it, as shown in Figure 31-7. Selection handles appear around the text box, and the placeholder text is highlighted. Figure 31-7. Click the text in a template text box to select both the text box and the example text.
|
2. | Type the replacement text. Your new text appears in the text box. |
3. | Click outside the text box on a blank area of the publication. Doing so deselects the text box, finishing your entry. |

Text boxes do not resize automatically in Publisher, so if the text you add is too long to fit within the text box, you need to resize the text, as described later in “Resizing, autoflow, and linked text boxes.”
Many of the templates have automated placeholders that automatically insert business information stored in the business information set in Publisher. If you have not yet specified information for the business information set, choose Edit ![]() Business Information and then click the Change Business Information link at the bottom of the Business Information task pane. Enter the information, click Save, and then click Update Publication. You can drag any of the components listed in the Business Information task pane onto a publication to add that item to the publication. Each business information item (or placeholder) has a blue dashed underline in the publication. When you point to such an item, you can click the smart tag button that appears and then click a choice in the shortcut menu to decide how to work with the information.
Business Information and then click the Change Business Information link at the bottom of the Business Information task pane. Enter the information, click Save, and then click Update Publication. You can drag any of the components listed in the Business Information task pane onto a publication to add that item to the publication. Each business information item (or placeholder) has a blue dashed underline in the publication. When you point to such an item, you can click the smart tag button that appears and then click a choice in the shortcut menu to decide how to work with the information.
Tip
After you click in a text box, you can press the Del key to delete it from the publication.
Creating a placeholder and adding text
Whether you used a template as the basis for your publication or created the publication from scratch, you can add a new text box to place text in any location that you like in the publication. To add the text box, use the Text Box button, which is the second button on the Objects toolbar at the left side of the Publisher window.
1. | Click the Text Box button on the Objects toolbar. |
2. | Drag diagonally on the publication page to create the text box in the desired size and shape (Figure 31.8). When you release the mouse button, the blinking insertion point appears within the text box. |
3. | Type the text. Your new text appears in the text box. |
4. | Click outside the text box on a blank area of the publication. Doing so deselects the text box, finishing your entry. |

Tip
Text you add into a text box is also called a story.
Inserting a text file
Often, writing text and designing a publication are two separate activities assigned to two different people within an organization or group, especially for a publication that requires a lot of text, such as a newsletter or catalog. The person handling the writing assignment typically uses Word, WordPad, or another word processing program to write and edit the text, because a word processing program is the better tool for that purpose.
You need not worry about retyping text supplied by a colleague. Instead, you can insert word processing files in popular formats including Word, WordPerfect, plain text (.txt), or Rich Text Format (.rtf) directly into a text placeholder. The steps for doing so, which follow, basically combine the process for adding text into a text box and opening a file:
1. | Click the text within the placeholder. If the text box is a template placeholder, this action selects both the text box and all the text within it. In the case of a placeholder for a newsletter story or other situation with linked text boxes, Publisher selects the entire placeholder story within all the linked boxes, as in the example in Figure 31-9. Figure 31-9. Publisher selects the entire story in linked text boxes.
|
2. | Select Insert |
3. | Navigate to the folder holding the file to insert. The dialog box lists the files with readable text formats stored in that folder, as in Figure 31-10. Figure 31-10. Insert a text file from a word processing program to avoid retyping the information.
Tip Click All Text Formats and then select Recover Text from Any File to list all the folder’s files in the dialog box. |
4. | Click the name of the text file to insert and then click OK. The text from the inserted file appears in the placeholder you selected in Step 1. |

Depending on the file format of the inserted file and whether any text and style formatting was applied in the original document, you may need to change the formatting of the text after inserting the file. The later section titled “Formatting text” delves into some of the formatting methods you can use.
Note
If the writer for a publication that you’re creating uses an old or rare word processing program, have the writer use the Save As or Export command in the program to save the file that you need to use as a plain-text or Rich Text Format file. Even PowerPoint can save files in Outline/RTF format.
Resizing, autoflow, and linked text boxes
Publisher does not resize a text box if the text you type or a file you insert is too lengthy. When the number of words you’ve typed into a text box exceeds the number the box can hold, a Text in Overflow button like the one shown near the lower-right corner of the text box in Figure 31-11 appears. When you see that button, you can drag one of the handles on the text box to enlarge the box to display the text in its entirety. You also can flow the text into another text box, as described later in this section.
Figure 31-11. The Text in Overflow button cues you that the text doesn’t fit in the text box.

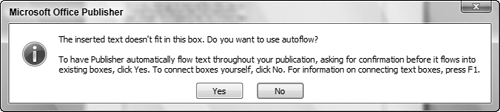
If you insert a file into a text box and the file’s contents are too large for the text box, Publisher displays a message box like the one shown in Figure 31-12. If you click Yes, Publisher automatically flows the extra text into subsequent frames in the publication until all the text has been placed, a feature called autoflow. If you click No, you can instead handle the extra text by resizing the text box manually. Or, you can link the text box to another of your choice, thus choosing exactly which text box will receive the flowed text. Linking text boxes enables you to control how a story flows from one text box to another.
Figure 31-12. Publisher enables you to autoflow extra text from an inserted file into other text boxes in the publication.
Tip
You can set up Publisher to resize text so that it can to some degree fit itself within the existing boundary of a text box. To toggle this AutoFit Text feature on and off, select Format ![]() AutoFit Text
AutoFit Text ![]() Best Fit or Format
Best Fit or Format ![]() AutoFit Text
AutoFit Text ![]() Shrink Text On Overflow.
Shrink Text On Overflow.
To link two text boxes so that the overflow text flows from one to the other:
1. | Click the text box that holds the overflow text. The Text in Overflow button appears below the text box. |
2. | Click the Create Text Box Link button on the Connect Text Boxes toolbar. The mouse pointer changes to a pitcher appearance. |
3. | Move the mouse pointer over the text box into which you want to flow the overflow text. As shown in Figure 31-13, the mouse pointer changes to a “pouring” appearance to indicate that it is in position to add the overflow text into the text box. |
4. | Click the text box to link. The overflow text appears in the box. If a Text in Overflow button appears below the newly linked text box, it holds still more overflow text that you can display by resizing or linking to another text box. |
Other special buttons appear when you click a linked text box. You may see the Go To Previous Text Box button above a linked text box. Clicking that button selects the previous text box. When a Go To Next Text Box button appears below a linked text box, you can click the button to select the later text box.
Formatting text
Some text formatting in Microsoft Publisher works similarly to the prior editions of Word and PowerPoint, and you can refer to earlier chapters about those programs to learn more about fonts, font sizes, alignments, and the type of text formats that you can apply. Click in the text box that has the text to format, drag over text within the text box to make a more specific selection to format or press Ctrl+A to select the entire story, and then use the choices on the Formatting toolbar or the Format menu to apply the desired changes. For example, you can click the Bold button on the Formatting toolbar to apply boldface, or click the Bullets button to convert the text to a bulleted list.
Often, text that you’ve imported from another file will have its own formatting applied rather than adhere to the formatting established by the publication template. In this case, you can work with the Styles task pane to apply template formatting to the text:
1. | Click in the text box that holds the text to format. |
2. | Drag over text within the text box or press Ctrl+A to select the entire story. The Ctrl+A shortcut even selects text in linked text boxes, making this a convenient shortcut when you need to reformat a larger volume of text distributed across multiple frames. |
3. | Click the drop-down list at the top of the task pane and then click Styles. The Styles task pane appears. |
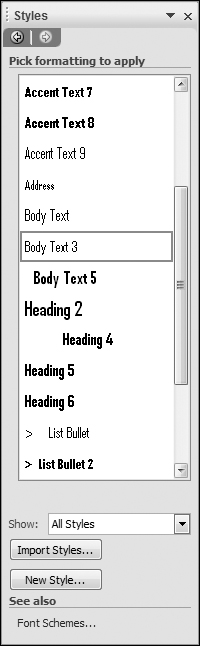
4. | Click the desired style (Figure 31-14). Publisher applies the style to the selected text. Figure 31-14. Applying a template style saves formatting legwork.
|
Note
Many of the body text styles automatically include spacing between paragraphs, so if you’ve pressed Enter to add space between paragraphs when creating your text—either in Publisher or in a word processing program—you may want to remove those extra hard returns after applying body text styles in Publisher.
One new feature that Publisher 2007 shares with some other Microsoft Office 2007 applications is the ability to apply a new font scheme to the publication. Changing the font scheme changes the entire set of styles in the publication to styles that use different fonts, sizes, and so on. By making one choice in a task pane, you can update the look of all the text in the publication. Here’s how to choose a new font scheme via the Format Publication task pane:
1. | Click the drop-down list at the top of the task pane and then click Format Publication. Note that if you’ve just created the publication, this task pane should already appear by default. |
2. | Click Font Schemes in the task pane. The task pane changes to display the available font schemes. |
3. | Scroll the list of schemes (Figure 31-15) and click the new scheme to apply. Publisher updates the fonts throughout the document for any text to which you’ve previously applied styles. If you want to return to the default font scheme for the template, choose the top font scheme choice. Figure 31-15. Applying a font scheme updates all the document styles to use new formatting.
|

The Measurement toolbar
One nice benefit about Publisher’s templates is that they have already been set up with great precision. All the text boxes, graphics, and other elements have been sized and aligned to exact dimensions. If you want to be as precise with your own publication—such as making sure that text boxes have the same width or sizing of a graphic to fit exactly within a column, you can use the Measurement toolbar (Figure 31-16).
Figure 31-16. View and change numerous dimensions for a selected object or text using the Measurement toolbar.
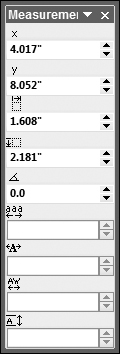
The Measurement toolbar displays the exact x (horizontal) and y (vertical) position of the upper-left corner of the selected text box or object. It also lists the object’s width, height, and rotation angle (if any). If you’ve selected text within a text box, the Measurement toolbar also displays text settings including Tracking, Text Scaling, Kerning, and Line Spacing.
To change any of the settings for the selected object or text, you can enter a new value in the applicable text box on the Measurement toolbar and press Enter, or you can use the spinner arrow buttons to change the entry. In this way, if you want three different text boxes in a publication to be exactly 2.205″ wide, you can use the Measurement toolbar to set that width dimension.
To display and hide the Measurement toolbar, you can right-click any toolbar and click Measurement. You also can select View ![]() Toolbars
Toolbars ![]() Measurement or double-click either the Object Position or Object Size icons on the status bar to open the Measurement toolbar.
Measurement or double-click either the Object Position or Object Size icons on the status bar to open the Measurement toolbar.