
Page Setup Basics
To fully grasp what this chapter is about, you’re going to have to make sure that you can see section breaks and other nonprinting formatting characters. Although some users think these characters are an eyesore and distract from the basic business of putting words into the computer, they should instead be viewed as flashlights that illuminate otherwise dark corners that are home to the secret and mysterious powers of Microsoft Word. Wow!
It’s time to turn on those flashlights, assuming they’re not already on. Looking at Figure 8-1, the upper paragraph has nonprinting formatting marks turned On, whereas the lower paragraph has them turned off. You press Ctrl+Shift+8 to toggle them on and off, or click the Show/Hide (¶) button in the Paragraph section of the Home tab on the Ribbon. To truly understand what’s happening in this chapter, as well as what’s happening in your documents, you should toggle those nonprinting formatting characters on—at least for now. From here on out in this chapter, it’s assumed that you can actually see what’s being talked about. Otherwise, you’ll miss out on all the fun and you won’t be in on the mystery.
Figure 8-1. These two paragraphs are identical, but in the upper one, Ctrl+Shift+8 was pressed to toggle nonprinting formatting marks on.

Page setup is an interesting concept in Word. It’s interesting because the phrase really isn’t about setting up a page. It’s really about setting up section formatting. We’ve talked earlier about distinct units of formatting—letters, words, sentences, paragraphs. For Word, section formatting is large-scale formatting that usually affects the entire document. The scale of section formatting is so encompassing, in fact, that it can’t be contained in styles. To contain section formatting, you need a whole document or a whole document template.
Section formatting
Word uses section breaks to separate distinctly formatted parts of a document. Most documents, in fact, have just a single section. Only when you need to apply different section formatting within the same document do you need to create a document that contains more than one section. Different sections are necessary for variations in the following kinds of formatting:
Headers and footers— Includes changes in page numbering style (except for Different First Page settings)
Footnotes— Can be set to be numbered continuously or set to restart numbering on every new page or every new section
Changes in line numbering style— Except for suppression on a paragraph-by-paragraph basis
Margins— Indentation can vary within a section, but not margins.
Orientation— Landscape versus portrait (actually done through paper size)
Paper size— 8.5 × 11 (letter), 8.5 × 14 (legal), 7.25 × 10.5 (Executive), A4 (210.03 × 297.03 mm), and so on.
Paper source— Upper tray, envelope feed, manual feed, and so on
Columns— Snaking newspaper-style columns, the number of which cannot vary within a document section
Them’s the breaks (section breaks, that is)
Word uses four kinds of section breaks. What kind of break you use depends on why you’re breaking:
Next Page— Causes the new section to begin on the next page.
Continuous— Enables the current and next section to coexist on the same page. Not all kinds of formatting can coexist on the same page, so even if you choose Continuous, Word will sometimes force the differently formatted content onto a new page. Section formatting that can be different on different parts of the same page include the number of columns, left and right margins, and line numbering.
Even Page— Causes the new section to begin on the next even page. If the following page would have been odd, then that page will be blank (unless it has header/footer content, which can include watermarks).
Odd Page— Causes the new section to begin on the next odd page. If the following page would have been even, then that page will be blank, except as noted for the Even Page break.
If you set up a letter in which the first page is to be printed on letterhead, but subsequent pages are to be printed onto regular stock (using different paper feed methods), the first page must be in a separate document section. If you set up a letter for which the first or last page is an envelope, the envelope must be in a separate section—for multiple reasons, because envelopes typically would use a different printer paper source, different orientation (landscape), and different margin settings.
Inserting section breaks
To insert a section break, in the Page Setup group of the Page Layout tab on the Ribbon, as shown in Figure 8-2, click Breaks. Word displays a variety of different kinds of breaks, including the four types of section breaks. Click on the desired section break.
Figure 8-2. The icons next to the four section break types provide a graphic hint of what the different breaks do.

Tip
If you’re inserting multiple breaks of the same kind to section-off part of a document to be formatted, after inserting the first section break, you can use F4 (Repeat) to insert subsequent breaks. Keep in mind that if you do something else after inserting a break, that F4 will now repeat that other action, rather than insert another break.
Automatic section breaks
Because some kinds of formatting require a section break in order to vary within a document, Word automatically inserts one or more section breaks when you apply “qualifying” formatting to selected text. Sometimes it gets those breaks right, sometimes not. You’ll have to be vigilant if you’re going to rely on this feature.
For example, suppose you want an interior set of paragraphs to be formatted in three columns, while the adjacent areas are formatted as a single column. Select the paragraph you want to differentiate and in the Page Layout tab, choose Columns ![]() Three Columns. Word automatically inserts continuous section breaks before and after the selected text to cordon it off for the distinct formatting. If you’re lucky, that’s what it does, that is.
Three Columns. Word automatically inserts continuous section breaks before and after the selected text to cordon it off for the distinct formatting. If you’re lucky, that’s what it does, that is.
Sometimes, but not always, Word will insert the wrong kind of section break before and/or after the selected text. It’s never quite clear why, but when that happens, the best recourse is to press Ctrl+Z to undo the attempt, bracket the target text with the desired type of section breaks, and then apply the formatting to the section you want formatted differently.
Styles, section formatting, and paragraph formatting
Styles can contain font/character formatting attributes and paragraph formatting attributes. However, they cannot contain section formatting attributes. Therefore, for example, you cannot create a style that would enable you to format a given selection with three columns and 1.5-inch left and right margins. Stand by for a few minutes, however, and you’ll see how you can indeed effectively create a style for section formatting, although it’s not really a style.
Recall that in Chapter 6, “Paragraph Formatting,” you learned that the paragraph mark is the repository of paragraph formatting. Similarly, the section break is the repository for section formatting. If you delete a section break, the current section adopts the formatting of the section that follows, the section whose section break is still intact.
Where is the section break in a document that has only one section? In fact, most documents have only a single section, so this is a serious and valid question. There is an implied section break at the end of the document, so if you insert a section break into a single-section document, the formatting for section 1 resides in that section break, and the formatting for section 2 effectively resides in the permanent paragraph mark at the end of the document.
Permanent? Yes, permanent. If you don’t believe it, with paragraph marks displayed, delete everything in a document. Now delete that last paragraph mark. You can’t do it! (You can hide it by clicking the Show/Hide button in the Paragraph group in the Home tab of the Ribbon, but that’s cheating, because it’s not really gone.)
Saving section formatting for reuse
If section formatting can’t reside in a style, then how can you save it for using later? Suppose you often use a very precise set of section formatting attributes—margins and columns, for example—and want to save them for using in other documents. There is a way, but it’s not using what’s traditionally called a style. Instead, use a Quick Part or a Building Block.
To do this, insert section breaks—continuous or next page, as needed—to bracket the area to be formatted. Format the first section break in as vanilla or as typical a way as possible. This first section break will be used to shield existing text from the new formatting when the Building Block or Quick Part is inserted into an existing document. If it’s inserted at the beginning of a document, the vestigial section break can then be deleted.
Format the area between the first section break and the second as needed (see the next section, “Page setup choices,” for a handy all-in-one-place location to set section formatting, or display the Page Layout tab of the Ribbon).
Finally, select both section breaks and the interior matter (it doesn’t have to contain text because section formatting resides in the section break), and choose Insert ![]() Quick Parts
Quick Parts ![]() Save Selection to Quick Part Gallery. In Create New Building Block, in the Name box, type a descriptive name for the item as well as a longer Description. If you’ll need this item frequently, save it to the Quick Part Gallery. Otherwise, you might as well save it as AutoText. Use the Category drop-down setting to choose Create New Category. In the Create New Category dialog box, as shown on the right in Figure 8-3, type a category name that you can later recall for accessing all of your custom section formatting. Click OK, twice.
Save Selection to Quick Part Gallery. In Create New Building Block, in the Name box, type a descriptive name for the item as well as a longer Description. If you’ll need this item frequently, save it to the Quick Part Gallery. Otherwise, you might as well save it as AutoText. Use the Category drop-down setting to choose Create New Category. In the Create New Category dialog box, as shown on the right in Figure 8-3, type a category name that you can later recall for accessing all of your custom section formatting. Click OK, twice.
Figure 8-3. Use Quick Parts or Building Blocks to create reusable section “styles.”

Now, whenever you want this particular kind of formatting, it’s there waiting for you. Choose Insert ![]() Quick Parts, and if it’s in the Quick Parts Gallery, click on it to insert it. If it’s in AutoText or elsewhere, choose Building Blocks Organizer. Click the Category heading to sort by category, select the item, and then click Insert. Or, if it’s a simple name, type it and press F3.
Quick Parts, and if it’s in the Quick Parts Gallery, click on it to insert it. If it’s in AutoText or elsewhere, choose Building Blocks Organizer. Click the Category heading to sort by category, select the item, and then click Insert. Or, if it’s a simple name, type it and press F3.
Page setup choices
For access to section formatting, click the Page Layout tab on the Ribbon. The Page Setup section provides access to a number of section formatting attributes, as well as to the Page Setup dialog box, as shown in Figure 8-4. The Page Setup section of the tab also contains Hyphenation, which is not a section formatting attribute. As discussed in Chapter 6, hyphenation is a paragraph formatting attribute. (The Margin tab of the Page Setup dialog box is shown in Figure 8-8. The Paper tab is shown in Figure 8-10.)
Figure 8-4. The Page Setup section of the Page Layout tab provides access to section formatting and the Page Setup dialog box.

Tip
If the Page Layout tab isn’t showing, you can also activate the Page Setup dialog box by double-clicking the vertical ruler, if it’s displayed, or even by double-clicking the left edge of the Word window in the document area (i.e., anywhere below the horizontal ruler and above the horizontal scroll bar).
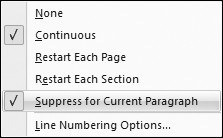
If you click the Line Numbers drop-down arrow in the Page Setup group of the Page Layout tab, note that the fifth option—Suppress for Current Paragraph, shown in Figure 8-5—actually is incomplete. The feature should say Suppress for Selected Paragraphs. If you choose this option, line numbers for the current paragraph (even if no text is selected) or for the entire selection are suppressed.
Figure 8-5. Suppress for Current Paragraph actually suppresses line numbering for the current selection, not section.
Margins
Using the Margins drop-down of the Page Setup group on the Page Layout tab, shown in Figure 8-6, you can apply a variety of different preset margin settings. If the document contains multiple sections, each of the presets would be applied only to the current document section if nothing is selected, or only to the selected sections if multiple sections are included in the selection.
Figure 8-6. The Margins drop-down offers a selection of preset margins, including Office 2003 Default, just in case you want to reminisce.

If you want more precise control, choose Custom Margins, which opens the Page Setup dialog box to the Margins tab, shown in Figure 8-7. From here, you can control all margins as needed, and apply the change where you want. If text is selected, then Selected Sections and Selected Text replace This Section and This Point Forward, respectively.
Figure 8-7. Using the Margins tab of the Page Setup dialog box, you can control how/where the new formatting is applied.

You can also adjust the top and bottom margins by dragging the blue and white boundary in the vertical ruler to the left of the document window (depending on your Personalize settings, you might see shades of gray or some other color rather than blue), also shown in Figure 8-7. To increase the top margin, drag the top border down. To increase the bottom margin, draw the bottom border up. In both cases, press the Alt key to display the margin setting as you’re dragging.
Orientation
Orientation refers to whether the page is laid out horizontally (landscape) or vertically (portrait—the default orientation). You might sometimes need to rotate a page to landscape in order to fit a particular picture, chart, table, or other object. It should be emphasized, however, that changing a page to landscape orientation carries with it a number of consequences that might be considerably worse and harder to deal with than trying to find a way to rotate the object itself.
Consider page numbers and other header and footer content. If the whole page is changed to landscape, then the header and footer now rotate as well. To have the headers and footers located in the correct position relative to portrait-oriented pages takes a bit of strategizing. The usual approach is to set up different headers and footers for the solitary landscape page. To get the orientation correct, you might consider putting the header and footer material either into a text box or a single-cell borderless table, in which the text has been rotated 90 degrees.
Alternatively, you can keep the orientation as portrait, and rotate the table, chart, or picture instead. For pictures and charts, rotation isn’t challenging. With Wrapping (Picture Tools Format tab, in the Arrange group) set to anything other than In line with Text, simply rotate the pictures or chart 90 degrees by dragging the green rotation handle at the top of the selected object.
Tables are a bit more challenging, but you have several possibilities. If you’re just now creating the table, select the entire table and in the Table Tools Layout tab, Alignment group, click Text Direction to rotate the text so that it can be read by tilting your head to the right or left. Keep in mind that columns and rows are reversed. It’s not necessarily easy to work this way, but it can be done, as shown in Figure 8-8. Notice that the header and footer are properly oriented to conform with the rest of the [unseen] document.
Figure 8-8. With all text in a table rotated 90 degrees, it’s possible to create a sideways table, rather than have to change orientation within a document.

Another option would be to copy the table to the Clipboard, choose Paste ![]() Paste Special on the Home tab, and paste the table into the document as a picture. Because it’s now a picture, you can choose any floating wrapping style and then rotate it as needed so that it fits comfortably, but sideways, in a portrait-oriented Word document page. As above, headers and footers will display in portrait mode because you haven’t changed the paper orientation.
Paste Special on the Home tab, and paste the table into the document as a picture. Because it’s now a picture, you can choose any floating wrapping style and then rotate it as needed so that it fits comfortably, but sideways, in a portrait-oriented Word document page. As above, headers and footers will display in portrait mode because you haven’t changed the paper orientation.
The downside is that sometimes the graphics resolution of this technique isn’t perfect. You’ll have to decide if it’s acceptable and legible. Plus, to make changes in the table, you need to maintain a copy of the actual table and remake the “conversion” as needed.
Another negative is that once you’ve done this to a table, you won’t be able to edit it anymore. If you decide to go this route, you might consider saving the nongraphic version of the table as a Building Block in the current template. If you need to modify it, it would still be accessible.
A variation of this approach, if the table fits into a window from which you can copy it, is to use screen capture software to take a picture of the table. This often yields more predictable and better-quality graphics, but it suffers from the same maintenance issues as the previous approach, and achieving it depends on having a sufficiently large monitor. To make a screen capture of a table under Windows XP, you’ll get the best results using an amenable screen capture program(such as SnagIt, from www.TechSmith.com, which is highly flexible). Under Vista, you can use the new Snipping Tool feature (Start ![]() All Programs
All Programs ![]() Accessories
Accessories ![]() Snipping Tool.
Snipping Tool.
Size
Size refers to paper size. A number of preset standard sizes are available by clicking the Size drop-down arrow in the Page Setup group of the Page Layout tab, shown in Figure 8-9. Clicking More Paper Sizes displays the Paper tab in the Page Setup dialog box. While it says “More Paper Sizes,” that’s not actually what you get. The “more” refers to the Custom Size setting at the bottom of the Paper Size list, which enables you to set any size up to 22 inches. This assumes that your printer supports something that large.
Figure 8-9. Click More Paper Sizes to display the Paper tab in the Page Setup dialog box.

Columns
Use the Columns tool in the Page Setup group on the Page Layout tab of the Ribbon to set the number of columns either in the current section or in all sections in the current selection if text is selected.
Page layout settings
We’ve already looked at the Margins and Paper tabs in the Page Setup dialog box. The Layout tab, visible in Figure 8-10, houses additional settings, some of which often go unnoticed. Headers and Footers settings are also set using the Layout tab; a full discussion of headers and footers comes later in this chapter.
Figure 8-10. The Different Odd and Even and Different First Page heading/footer settings enable you to have different headers and footers without using another section break.

If the Page Layout tab is showing, the quickest way to display the Layout tab of the Page Setup dialog box is by clicking Line Numbers ![]() Line Numbering Options in the Page Setup group, even if you’re not interested in line numbering. If the Page Layout tab of the Ribbon isn’t showing, you can double-click on the vertical ruler or between the horizontal ruler and the bottom of the Ribbon area to display the Page Setup dialog box, and then click the Layout tab.
Line Numbering Options in the Page Setup group, even if you’re not interested in line numbering. If the Page Layout tab of the Ribbon isn’t showing, you can double-click on the vertical ruler or between the horizontal ruler and the bottom of the Ribbon area to display the Page Setup dialog box, and then click the Layout tab.
Fixing or changing a section break
The Section Start setting shown in Figure 8-10 is a bit cryptic and confusing to many users, but it can be extremely useful. Have you ever ended up with the wrong kind of section break? For example, suppose you want a Continuous section break, but you have a New Page, Odd, or Even section break, instead. This can happen either because you inserted the wrong kind of break, or because Word inserted the wrong kind of break automatically.
The ordinary impulse is to delete the wrong one and insert the kind you want. Sometimes, however, despite your best efforts, you still end up with the wrong kind of break.
Section Start to the rescue! Put the insertion point into the section that is preceded by the wrong kind of break. Activate the Page Setup dialog box using any of the techniques described earlier. Click the Layout tab to display the dialog box view shown in Figure 8-10. Set Section Start to the kind of section break you want and click OK.
Vertical page alignment
Another often unnoticed feature in Word is the Vertical Alignment setting (found on the Layout tab of the Page Setup dialog box). By default, Word sets vertical alignment to Top, and most users never discover the additional options shown in Figure 8-11. As a section formatting attribute, you can set vertical alignment for the whole document or just for selected sections.
Figure 8-11. Word provides four different types of vertical page alignment.

Vertical alignment can be extremely useful for particular parts of a publication—such as the title page for a format report, booklet, or book—as well as for short letters, brochures, newsletters, and flyers. For title pages, setting vertical alignment to Centered is almost always more efficient than trying to insert the right number of empty paragraphs above the top line, or trying to set the Before spacing to just the right amount. For one-page notices, vertical alignment is also often just what the doctor ordered.
For some newsletters and other page-oriented publications, setting the alignment to Justified serves a couple of purposes. Not only does it make the most use of the whole sheet of paper, it adjusts line spacing to do it. Hence, the appearance is smoother than it might be otherwise. This also lets you optimize the point size if you want to make the font as large as possible without spilling onto another page.