
Views
To expand the ways of working with documents, Word offers a number of different environments you can use, called views. For reading and performing text edits on long documents with a minimum of UI (user interface) clutter, you can use Full Screen Reading view. For composing documents and reviewing text and basic text formatting, you can choose a fast-display view called Draft view.
For working with documents containing graphics, equations, and other non-text elements, where document design is a strong consideration, there’s Page Layout view. If the destination of the document is online (Internet or intranet), Word’s Web Layout view removes paper-oriented screen elements, enabling you to view documents as they would appear in a Web browser.
For organizing and managing a document, Word’s Outline view provides powerful tools that enable you to move whole sections of the document around without having to copy, cut, and paste. An extension of Outline view, Master Document view enables you to split large documents into separate components for easier management and workgroup sharing.
Draft view is the new Normal view
If you’re someone who ordinarily works with Word in Normal view, you might be alarmed to see the view options in Word 2007. Shown in Figure 4-22, they include Print Layout, Full Screen Reading, Web Layout, Outline, and Draft. Where’s Normal?
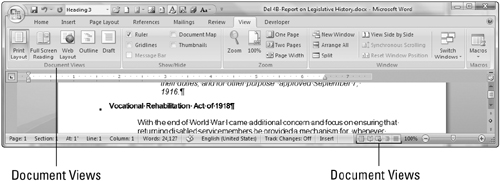
“Normal” as a view name is history. What was Normal is now called Draft.
Did you ever find it confusing that earlier Word versions used the word normal in at least three ways that really had nothing to do with each other? Users, especially new or casual users, often were confused by the differences between Normal view, Normal style, and Normal.dot. In Word 2007, what used to be called Normal view is now called Draft view, so maybe there will be less confusion.
Internally, when you click on Draft either in the View ribbon or on the status bar, Word still uses the ViewNormal command. You can confirm this with the following tip.
Tip
You can determine Word’s name for most ribbon or status bar–based commands with a simple keystroke and a click. First, switch to Print Layout view so that the Draft view command will have an effect. Next, press Ctrl+Alt and the plus (+) sign on the number pad. This turns the mouse pointer into the cloverleaf pattern shown in Figure 4-23. Use that pointer to click on (just about) any tool. Word responds by displaying the Customize Keyboard dialog box. The Commands box displays the actual command’s name, as shown in Figure 4-24. (I’ll have more to say about the amazingly useful cloverleaf tool in subsequent chapters.) When in “cloverleaf” mode, Word returns to normal when the Customize Keyboard dialog box is closed, or you can hasten the return to normal by pressing the Esc key.
Figure 4-23. The cloverleaf mouse pointer indicates that ToolsCustomizeKeyboardShortcut mode is active.
![]()
Figure 4-24. “Cloverleaf” mode (ToolsCustomizeKeyboardShortcut) displays the next Word command or macro you perform in Word; it responds to mouse and keyboard actions.

If Word is really running ViewNormal, what happened to Draft view? It’s still there. In the Word Options dialog box, choose Advanced. Near the bottom of the Show Document Content options, notice the option to Use Draft Font in Draft and Outline Views. You can also choose the font and point size to use for Draft.
Tip
When you need to distinguish between an uppercase i (I), a lowercase L (l), the number one (1) and the vertical line segment (|, usually typed using shift on most U.S. keyboards), the single best font I’ve discovered that makes the distinction clearest is Comic Sans. It’s also a very comfortable and readable font, its nonprofessional-sounding name notwithstanding. If after applying Comic Sans you’re still uncertain as to what’s what, try toggling the case. Properly distinguishing among these characters, as well as between 0 (zero) and O (capital o), can make a world of difference when you are trying to convey part numbers, serial numbers, user names, and passwords.
For editors and writers, Normal view was the workhorse view in many prior versions of Word. It enabled them to focus on just words. When coupled with wrapping text to fit the window, you could take off the reading glasses and zoom to any magnification you like. You don’t have to monkey around with the horizontal scroll bar or bothersome floating pictures to see what’s written. It’s also faster. Let the layout editors worry about the placement of pictures and other formatting nuances. If you’re used to thinking Normal view, then in Word 2007, think Draft view with the Draft Font view turned off.
If you plan to toggle between Draft and Draft Fonts views very often, you should know that Word has a built-in ViewDraft command that toggles the Use Draft Font setting on and off. To make it more accessible, you might either assign it to a keyboard shortcut or put it onto the Quick Access Toolbar (QAT) for ready access. In the QAT customization dialog box, it’s in the All Commands list.
Caution
If you do use the ViewDraft command, be advised that font and point size changes will not be reflected in what you see onscreen. This can be good if the original is a legal contract written in 4-point type. It can be bad, however, if you don’t toggle out of draft mode before sending a .doc file to someone else for review, particularly if you’ve been careless with the font and point size formatting.
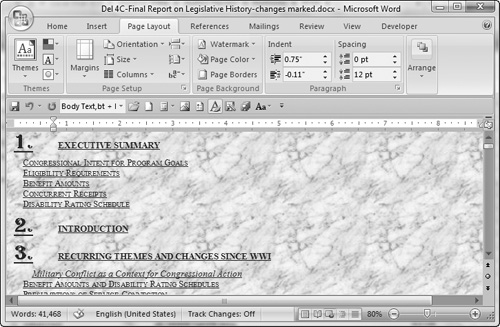
Print Layout
If Normal view (now Draft view) was the workhorse view for Word 2003, it appears that Print Layout is destined to be the workhorse view for Word 2007. That’s because one of Word 2007’s strongest new features, live preview, does not work in Draft view. Live preview works in Print Layout and Web Layout. If you could actually display the Formatting tab Ribbon components when in Print Preview mode, it might work there, as well. However, you can’t do that (at least not using the tools and techniques that come with Office 2007).
Note
It is possible that some Ribbon behavior is not fully carved into stone. At this writing, however, there are no Live Preview–enabled tools on Word’s Print Preview tab on the Ribbon, so whether it works or not is moot.
Full Screen Reading
Full Screen Reading view is similar to Word 2003’s Reading Layout view. Shown in Figure 4-25, the Word 2007 view now uses more of the screen than the comparable Word 2003 view did. It also provides a number of new features, as well. For example, by default, reading mode does not permit editing. Often, this is exactly what you want. But, not always. Switch a document into Full Screen Reading view and peruse the different options.
Figure 4-25. Word 2007’s Full Screen Reading view features a number of new View options.

Tip
Full Screen Reading view offers a variety of ways to scroll up and down: Page Down/Page Up, Space/Shift+Space, Enter/Shift+Enter, Right/Left arrow keys, Down/Up arrow keys, the Next/Previous graphic controls at the bottom of the window, and the scroll wheel on your mouse.
Web Layout
Web Layout is designed for composing and reviewing documents that will not be printed. Hence, information such as page and section numbers are excluded from the status bar. If the document contains hyperlinks, they are displayed underlined by default, as shown in Figure 4-26. Background colors, pictures, and textures are also displayed.
Figure 4-26. Web Layout suppresses paper-oriented information such as pages and section numbers, and includes Web-oriented features such as underlined hyperlinks and background colors and textures.
Outline (Master Document tools)
The final distinct Word view is Outline. Outlining is one of Word’s most powerful and least utilized tools for writing and organizing your documents. To avail yourself of this tremendous resource, the easiest way is simply to use Word’s Heading styles. Heading levels 1 through 9 are available using styles named Heading 1 through Heading 9. You don’t need to use all nine levels—most users find that the first three or four levels are adequate for most structured documents. If your document is organized using the built-in heading levels, then a wonderful world of document organization is at your fingertips.
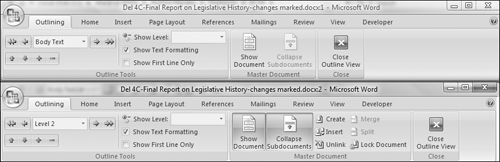
As suggested by the title of this section, Outline view has a split personality, of sorts. As an outline manager, this view can be used on any document with heading styles that are tied to outline levels. If you don’t want to use Word’s built-in Heading styles, you can use other styles and assign them to different outline levels. Outline view’s other personality is the Master Document manager. Compare the two Ribbons shown in Figure 4-27. Both say Outlining, yet the lower Ribbon contains additional tools. To display the additional tools, click Show Document.
With regard to the Master Document feature, I’ll just dish out a little warning. Potentially, this is an extremely powerful document control feature for users who are working on parts of the same document. It provides a way to carefully control checking out and checking in of document parts, as well as to manage problems inherent in working with very large documents.
In previous versions of Word, the Master Document feature was quite unstable, leading to the adage “There are two kinds of master document users: those whose documents are corrupted, and those whose documents will soon be corrupted.” Is this harsh assessment still true or does the existence of the new Word document format based on XML relegate those concerns to history? The jury is still out.