
Workspace Management and Options
The Document Management pane provides six tools for keeping informed and managing your workspace documents:
The sections that follow look at each of these. Notice at the bottom of the Document Management pane the Get Updates button and the Options link. Click Get Updates to refresh the information provided in the Document Management pane (for example, status information, number of members, and so on) as well as to get the latest updates for the currently opened document. Click the Options link to set your Document Management options using the Service Options dialog box, shown in Figure 40-6.
Figure 40-6. SharePoint defaults to updating status and other workspace data every 10 minutes. Other settings shown here are not necessarily the defaults.

Status
The Status tool lists information about the current document. This information can be provided automatically, depending on your update interval, as shown in Figure 40-6.
Members
The Members tool shows the number of members online. You can send e-mail to all members, and, depending on your permission level, add new members. To add new members, click Add New Members. In Choose Members, shown in Figure 40-7, type e-mail addresses or user names, separated by semicolons. Notice the format for user names: DOMAIN ame.
Figure 40-7. You can add multiple new members at the same time.

By default, SharePoint has five default permission levels you can assign:
Administrators (Full Control)— These have complete control over the SharePoint Web site. They are able to configure settings, manage users and groups, and monitor usage statistics.
Web Designers (Design)— Member of this group use SharePoint-compatible editors such as SharePoint Designer to customize the content of the SharePoint site and libraries.
Contributor (Contribute)— These members can interact with different parts of the SharePoint Web, lists, and document libraries. They create and manage personal views and cross-site groups, and set up different parts of the Web.
Reader (Read)— Readers can view items in lists and document libraries, view different SharePoint site pages, and create sites using the Self-Service Site Creation tools.
Guest— This is a special custom permission level whereby users are given permissions for specific lists. This provides access to that list, but not to the entire site.
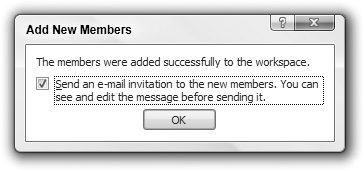
After adding members, SharePoint displays confirmation that they were added, as shown in Figure 40-8. If you opt to send an e-mail message, it will contain information about how to access the SharePoint server.
Figure 40-8. When adding new members, you can send them an e-mail.
Tasks
Use the Tasks tool, shown in Figure 40-9, to establish and manage workflow, control task/workflow alert settings, and view workflow. Note that clicking “Alert me about tasks” will open the appropriate settings in your browser. This is true for all of the different Alert links shown in each of the six different document workspace tools. The format and options for alerts vary by SharePoint site. Click View Workflow Tasks to see the status of existing tasks.
Figure 40-9. Use the Tasks tool to add tasks, set alerts, and view workflow.

Adding tasks
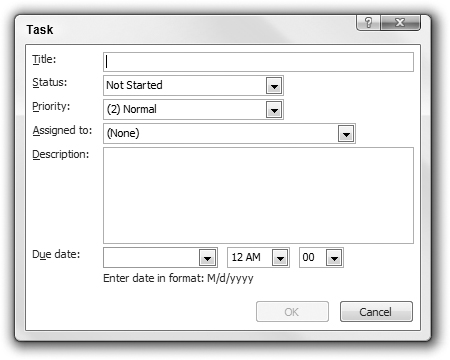
To create a new task, click Add New Task. This opens the Task dialog box shown in Figure 40-10. Use the Task dialog box to create a title for the task, set task status and priority, assign the task to a specific team member (if appropriate), and set a due date and time. It’s usually an excellent idea to type a description of the task as well, so that others (especially those to whom tasks are assigned) know what this is about. Include in the description enough information so that the assignee will know when the task is finished.
Figure 40-10. Assign tasks to establish project workflow.
Use the Documents tool, shown in Figure 40-11, to display documents that are currently open by members, as well as to add new documents, add new folders, and set document alerts. Once again, as is the case for the other Document Management tools, alerts are managed using the Web interface.
Figure 40-11. Use the Documents tool to manage documents and alerts.

Adding New Documents
To add a new document to the current workspace folder, click the Add New Document link. Word displays the Add New Document dialog box. Click Browse to navigate to the file’s local location; select the file and click Open. Back in Add New Document, click OK. Word saves the document to the SharePoint workspace, as shown in Figure 40-12.
Figure 40-12. Choosing Add New Document copies a local file to the SharePoint server.

To delete or perform other actions on a document, hover the mouse over a document in the list and click the drop-down arrow next to a document to display document options, as shown in Figure 40-13. If a document is currently checked out (open) by a member, certain options will not be available (Open, Delete, Document Updates, Save Updatable Copy, and Publish Back to Source Location). Options that don’t affect the document’s current status, however, are available (Alert Me About This Document, Check Status, and Create Document Workspace).
Figure 40-13. Click a document’s drop-down arrow to see a list of available options.

Creating a new document workspace
You’ve already seen at least one method for creating a new document workspace on a SharePoint site. In Figure 40-13, notice that you can create a new document workspace from a document’s drop-down menu. Click Create Document Workspace. The dialog box shown in Figure 40-14 appears, explaining the purpose and implications of this option. If you create a new document workspace, the selected document will be stored there. However, you still retain the ability to automatically publish changes to the document back to its original location.
Figure 40-14. Right-click a document and choose Create Document Workspace to save the selected document to it.

Adding new folders
To add a new folder in the current workspace, click Add New Folder. In Add New Folder, type a name for the folder. There is no facility for removing a folder in the Document Management pane. Instead, back in the document library view (refer to Figure 40-2), click the folder you want to delete, press the Delete key, and confirm the deletion. If other options are available, you can access them by clicking Tools in either the Open or the Save dialog box.
Links
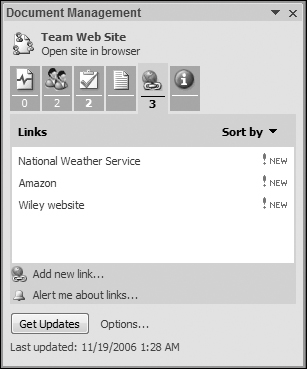
Use the Links tool, shown in Figure 40-15, to display and add links relevant to the document workspace. If you or team members discover relevant articles, documents, data sources, or Web sites, click Add New Link. Type the URL, a succinct description, and any notes you have that might be useful to other team members. You and other members can see these details by hovering the mouse over a link, clicking the drop-down arrow, and choosing Edit Link. Additional options in the drop-down list are Delete Link and Alert Me About This Link.
Figure 40-15. Use the Links tool to provide information about related resources, data, and documents.
Document Information
Use the Document Information tool to obtain information about open documents. As shown in Figure 40-16, you can click the drop-down arrow next to a document to display additional information and options related to that document. If available, there’s information on the owner/author of the document, a link for scheduling a meeting, as well as a variety of ways to contact the document owner. Rounding out integration in Office 2007, notice that the menu offers to let you add the document owner to Outlook contacts, as well as look at the Outlook properties for an existing contact. Notice the Additional Actions command. Whether this command actually contains additional actions will depend upon the designer of your SharePoint site.
Figure 40-16. The Document Information tool provides additional information about open documents.
