 Creating a Section
by Lisa A. Bucki, Gavin Powell, Michael R. Irwin, Peter G. Aitken, Michael R. Groh,
Office 2007 Bible
Creating a Section
by Lisa A. Bucki, Gavin Powell, Michael R. Irwin, Peter G. Aitken, Michael R. Groh,
Office 2007 Bible
- Copyright
- About the Authors
- Credits
- Acknowledgments
- Introduction
- Common Office Features
- Creating Documents with Word
- Making the Numbers Work with Excel
- Persuading and Informing with PowerPoint
- A First Look at PowerPoint 2007
- Creating a Presentation, Slides, and Text
- Working with Layouts, Themes, and Masters
- Working with Tables and Charts
- Creating a New Table
- Moving Around in a Table
- Selecting Rows, Columns, and Cells
- Editing a Table’s Structure
- Applying Table Styles
- Formatting Table Cells
- Understanding Charts
- Starting a New Chart
- Working with Chart Data
- Chart Types and Chart Layout Presets
- Working with Labels
- Controlling the Axes
- Formatting a Chart
- Rotating a 3-D Chart
- Summary
- Using SmartArt Diagrams, Clip Art, and Pictures
- Understanding SmartArt Types and Their Uses
- Inserting a Diagram
- Editing SmartArt Text
- Modifying SmartArt Structure
- Modifying a Hierarchy Diagram Structure
- Formatting a Diagram
- Choosing Appropriate Clip Art
- About the Clip Organizer
- Inserting Clip Art on a Slide
- Clip Art Search Methods
- Working with Clip Art Collections
- Understanding Raster Graphics
- Importing Image Files into PowerPoint
- Sizing and Cropping Photos
- Compressing Images
- Summary
- Building Animation Effects, Transitions, and Support Materials
- Delivering a Live Presentation
- Organizing Messages, Contacts, and Time with Outlook
- Fundamentals of E-Mail
- Setting Up Your E-Mail Accounts
- Modifying Account Settings
- Using Outlook Profiles
- Composing and Sending Messages
- Reading and Replying to Messages
- Understanding the Inbox Display
- Understanding Files and Folders
- Outlook Data Files
- Working with Outlook Folders
- Deleting Items and Using the Deleted Items Folder
- Setting Options for an Individual E-Mail Message
- Setting Global E-Mail Options
- Summary
- Processing and Securing E-Mail
- Understanding Junk E-Mail Filtering
- Setting Junk E-Mail Options
- Blocking and Allowing Specific Addresses
- Understanding E-Mail Rule Basics
- Creating a New Rule
- Some Rule Examples
- Managing Rules
- Protecting Against Viruses
- Dealing with Attachments
- Macro Security
- Using Certificates and Digital Signatures
- HTML Message Dangers
- Summary
- Working with Contacts
- Working with Appointments and Tasks
- Fundamentals of E-Mail
- Designing Publications with Publisher
- Tracking Detailed Data with Access
- An Introduction to Database Development
- Creating Access Tables
- Getting Started with Access 2007
- Creating a Database
- The Access 2007 Environment
- Creating a New Table
- Creating tblContacts
- Setting the Primary Key
- Printing a Table Design
- Saving the Completed Table
- Manipulating Tables in a Database Window
- Adding Records to a Database Table
- Navigating Records in a Datasheet
- Changing Values in a Datasheet
- Summary
- Creating and Entering Data with Basic Access Forms
- Selecting Data with Queries
- Understanding Queries
- Creating a Query
- Selecting Fields
- Displaying the Recordset
- Working with Fields
- Changing the Sort Order
- Displaying Only Selected Records
- Printing a Query’s Recordset
- Saving a Query
- Adding More Than One Table to a Query
- Working with the Table/Query Pane
- Adding Fields from More Than One Table
- Understanding Multi-Table Query Limitations
- Summary
- Presenting Data with Access Reports
- Gathering Information
- Sharing and Collaboration
Creating a Section
Each new section in a notebook works much like a tabbed divider added into a three-ring binder. The section sets off the pages within and provides a label for them. If you create a notebook for client information, for example, you might create a new section for each client. If you create a notebook for school studies, you might create a section for each class during the current semester.
To add a new section to a notebook:
1. | In the Notebooks navigation bar, click the name of the notebook to which you want to add a section. The contents of the selected notebook appear. |
2. | Choose File Figure 38-5. Type a name to replace the placeholder in the new section’s tab.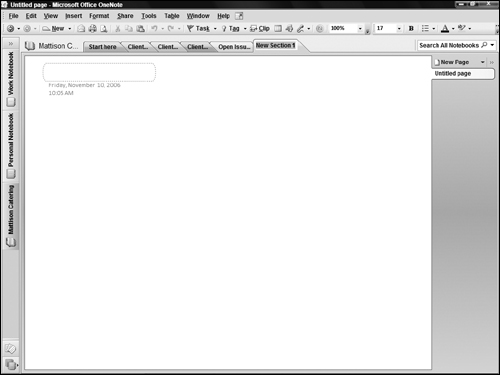
|
3. | Type the name for the new section and press Enter. The finished section appears, waiting for you to add pages, notes, and other content. |
-
No Comment
..................Content has been hidden....................
You can't read the all page of ebook, please click here login for view all page.