
Closing and Reopening Presentations
You can have several presentation files open at once and switch freely between them, but this can bog down your computer’s performance somewhat. Unless you are doing some cut-and-paste work, it’s best to have only one presentation file open—the one you are actively working on. It’s easy to close and open presentations as needed.
Closing a presentation
When you exit PowerPoint, the open presentation file automatically closes, and you’re prompted to save your changes if you have made any. If you want to close a presentation file without exiting PowerPoint, follow these steps:
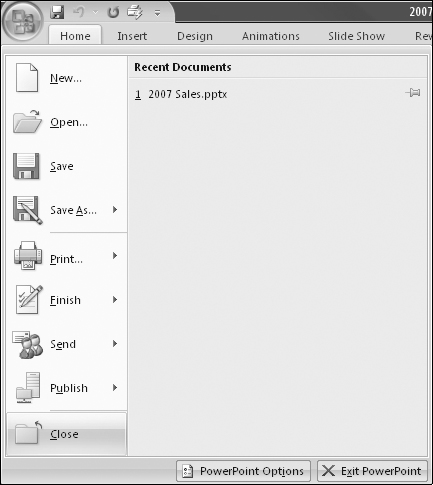
1. | Choose Office Button Figure 21-11. Close the presentation via the Office menu.
|
2. | If you have made any changes to the presentation, you’re prompted to save them. If you don’t want to save your changes, click No, and you’re done. |
3. | If you want to save your changes, click Yes. If the presentation has already been saved once, you’re done. |
4. | If the presentation has not been saved before, the Save As dialog box appears. Type a name in the File Name text box and click Save. |
Opening a presentation
To open a recently used presentation, select it from the right side of the Office menu. Although only one file appears in Figure 21-11, up to nine can appear by default.
Tip
To pin a certain file to the Office menu’s list so that it never scrolls off, click the pushpin icon to the right of the file’s name on the menu. You can increase or decrease the number of recently used files that appear on the Office menu. Choose Office Button ![]() Office Button
Office Button ![]() PowerPoint Options, click Advanced, and in the Display section, set the Number of Documents in the Recent Documents List.
PowerPoint Options, click Advanced, and in the Display section, set the Number of Documents in the Recent Documents List.
If the presentation you want to open does not appear on the Office menu, follow these steps to find and open it:
1. | Choose Office Button |
2. | Choose the file you want. If necessary, change the location to find the file. Cross-Ref See the section “Changing drives and folders” earlier in this chapter if you need help. |
3. | Click Open. The presentation opens. |
To open more than one presentation at once, hold down the Ctrl key as you click each file you want to open. Then, click the Open button and they all open in their own windows.
The Open button in the Open dialog box has its own drop-down list from which you can select commands that open the file in different ways. See Figure 21-12, and refer to Table 21-4 for an explanation of the available options.
Figure 21-12. The Open button’s menu contains several special options for opening a file.

| Open Button Setting | Purpose |
|---|---|
| Open | The default simply opens the file for editing. |
| Open Read-Only | Allows changes but prevents those changes from being saved under the same name. |
| Open Copy | Opens a copy of the file, leaving the original untouched. |
| Open in Browser | Applicable only for Web-based presentations, opens it for viewing in a Web browser. |
| Open and Repair | Opens the file, and identifies and repairs any errors it finds in it. |
| Show Previous Versions | Applicable only if the presentation file is stored on an NTFS volume under Windows Vista. See the next section for details. |
Opening a file from a different program
Just as you can save files in various program formats, you can also open files from various programs. PowerPoint can detect the type of file and convert it automatically as you open it, so you do not have to know the exact file type. (For example, if you have an old PowerPoint file with a .ppt extension, you don’t have to know what version it came from.) The only problem is with files that don’t have extensions that PowerPoint automatically recognizes. In that case, you must change the File Type setting in the Open dialog box to All Files so that the file to be opened becomes available on the file list. See Figure 21-13. This change is valid for only this one use of the Open dialog box; the file type reverts to All PowerPoint Presentations, the default, the next time you open it.
Figure 21-13. To open files from different programs, change the File Type setting to All Files.

Caution
PowerPoint opens only presentation files and text-based files such as Word outlines. If you want to include graphics from another program in a PowerPoint presentation, copy-and-paste them into PowerPoint or insert them using the Picture command on the Insert tab. Do not attempt to open them with the Open dialog box.
Finding a presentation file to open
If you have forgotten where you saved a particular presentation file, you’re not out of luck. The Open dialog box (under Windows Vista) includes a Search box that can help you locate it. See Figure 21-14.
Figure 21-14. Use the Search box in the Open dialog box (Windows Vista only) to look for a file.

To search for a file, follow these steps:
1. | Choose Office Button |
2. | Navigate to a location that you know the file is in. For example, if you know it is on the C: drive, click Computer in the Favorite Links list and then double-click the C: drive. |
3. | Click in the Search box and type part of the filename (if you know it) or a word or phrase used in the file. See Figure 21-14. |
4. | Press Enter. A list of files appears that match that specification. |
5. | Open the file as you normally would. |
Note
You can also use the Search utility from outside of PowerPoint. In Windows, click Start and choose Search. Although the Search utility in Windows Vista is different from the one in Windows XP, both can find a file by name, content, author, date, or many other properties.