Fine-Tuning Objects
If you can’t find just the right Design Gallery object or other object settings to meet your needs, or if you just like noodling around with design possibilities in your publications, you may find yourself creating and positioning many objects. Although you can drag with the mouse and use tools such as the Measurement toolbar to help you size and position objects, other shortcuts might be more appropriate in some cases. This section shows you some more tricks—aligning and grouping objects, and wrapping and hyphenating text.
Aligning objects
Aligning objects can be a little frustrating, especially if you have a finicky mouse or are working with a notebook touchpad to drag objects. You can use the arrow keys to move a selected object, but each press of a key merely nudges the object a very small distance in the indicated direction. Plus, if you’re trying to do something trickier such as align multiple selected objects, you have no precise way to do it with the mouse.
Use the commands on the Arrange ![]() Align or Distribute submenu instead of the mouse to align multiple selected objects. After you Shift+click to select the desired objects, select one of the commands on that submenu to align the objects’ left, center, and right horizontal dimensions or top, middle, or bottom vertical dimensions. You also can use the Distribute Horizontally or Distribute Vertically choice to space the objects equally.
Align or Distribute submenu instead of the mouse to align multiple selected objects. After you Shift+click to select the desired objects, select one of the commands on that submenu to align the objects’ left, center, and right horizontal dimensions or top, middle, or bottom vertical dimensions. You also can use the Distribute Horizontally or Distribute Vertically choice to space the objects equally.
Figure 32-14 shows an example of how you can use the Arrange ![]() Align or Distribute submenu commands to work with publication objects. After selecting both objects, both the Arrange
Align or Distribute submenu commands to work with publication objects. After selecting both objects, both the Arrange ![]() Align or Distribute
Align or Distribute ![]() Align Center and Arrange
Align Center and Arrange ![]() Align or Distribute
Align or Distribute ![]() Align Middle commands were selected. These commands placed the center point of the puppy clip art image right over the center point of the heart AutoShape.
Align Middle commands were selected. These commands placed the center point of the puppy clip art image right over the center point of the heart AutoShape.
Figure 32-14. Snap objects into position using alignment commands.

Tip
To control how an object layers when positioned with other objects, right-click the object, point to the Order command, and click one of the choices in the submenu that appears. For example, the Bring to Front command positions the selected object in front of (on top of) other stacked objects.
Grouping objects
After you’ve placed multiple objects into the position you want, such as in the example in Figure 32-14, you should group the objects so that you can move them around as a unit without accidentally misaligning one or more of them. When you use Shift+click to select multiple objects, the Group Objects button shown in Figure 32-15 appears. Click that button to group the objects, or select Arrange ![]() Group (Ctrl+Shift+G). To ungroup a selected group, click the Ungroup Objects button that appears, or select Arrange
Group (Ctrl+Shift+G). To ungroup a selected group, click the Ungroup Objects button that appears, or select Arrange ![]() Ungroup (Ctrl+Shift+G).
Ungroup (Ctrl+Shift+G).
Figure 32-15. Click the Group Objects button to make the selected objects stick together as a single unit.

Note that you can still select an individual object within a group, such as to work with the object’s formatting settings. First click the group and then click the individual object. Selection handles with x marks in them appear around the selected object within the group.
Wrapping and hyphenating text
Your text will read much better if you make sure that you’ve chosen the right text-wrapping settings for objects and have chosen whether to use hyphenation in a story.
You can apply one of several text-wrapping styles to objects, typically shapes or picture objects that you want to appear within the text. Wrapping style options include Square, Tight, Through, Top and Bottom, and None. For example, Figure 32-16 illustrates the Tight wrapping style used for a grouped object. To choose a wrapping setting, right-click the picture or object and then click Format Picture or Format Object. Click the Layout tab in the dialog box that appears, click a choice in the Wrapping Style area, and then click OK.
Figure 32-16. The right wrapping setting makes sure that text remains readable when it flows around the object.

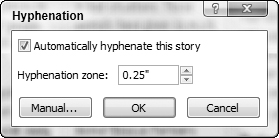
If you’re wrapping text tightly around an object or have a narrow textbox with large text, Publisher may by default hyphenate words to try to fill the space as well as possible. Many readers prefer not to see hyphens because they become tiring to see in longer stories. You can use these steps to turn the automatic hyphenation off in any story:
1. | |
2. | Select Tools Figure 32-17. Control hyphenation in any story by using this dialog box.
|
3. | Click the Automatically Hyphenate This Story checkbox to clear the check. |
4. |