
Working with Graphics
Graphics bring publication stories to life. If you’re a Realtor creating a flyer to describe a terrific house that you have for sale, anyone who sees your flyer will really know how fabulous the house is if you include pictures of the granite countertops in the kitchen, the luxurious bathroom, and the gorgeous patio and landscaping in the back yard. Publisher makes it easy to add pictures and other graphic elements to punch up a story and really sell your message.
Inserting a picture file
Digital cameras and scanners are virtually as cheap as film cameras once were. Even the typical home or small business generally has a digital camera and users who take and transfer dozens of digital pictures to the computer’s hard disk. Microsoft Publisher enables you to place pictures in formats commonly captured by digital cameras, such as JPEG and TIFF, as well as numerous other graphics formats created with drawing and painting programs, directly into a publication.
This process does not require a picture placeholder, so when you’re ready to insert a digital picture file into a publication, follow this process:
1. | Display the page in the publication on which you’d like to insert the picture. Clicking a page icon in the status bar takes you there. |
2. | Select Insert |
3. | |
4. | Click the name of the text file to insert and then click Insert. The inserted picture file appears on the page. |
After you insert the picture, you need to resize and position it as needed. You can drag the handles that appear on the corners and sides of the picture (Figure 31-17) to resize it, or move the mouse within the picture and drag to move it. You also can use the Measurement toolbar as described earlier to set the picture’s size and position. When you finish sizing the picture, click outside it to deselect it.
Figure 31-17. Resize and move the inserted picture as needed.

Note
You can insert an image directly from a scanner or digital camera connected with your system. For the process to work, the device must be installed under Windows, connected to the system, and then powered on (or for a camera, to the mode for playing back or transferring pictures). Then use the Insert ![]() Picture
Picture ![]() From Scanner or Camera command to start the transfer process. Refer to Chapter 9, “Tables and Graphics,” for more details about working with a scanner or digital camera to bring an image into an Office application.
From Scanner or Camera command to start the transfer process. Refer to Chapter 9, “Tables and Graphics,” for more details about working with a scanner or digital camera to bring an image into an Office application.
Caution
If you plan to have your publication professionally printed, you need to use high-resolution pictures to get good results. If you crop a portion of a digital camera shot and then size it at a large size in the publication, those changes might result in a low-resolution graphic that prints with a fuzzy or blocky appearance. If you have any doubts about how an image might print, ask the print shop to inspect your publication file for such problems before proceeding with your print order.
Inserting a Clip Art image
If you don’t have your own digital pictures but want to flesh out your publication with some images, you can take advantage of the Clip Art available in Office and via Microsoft Office Online. The Clip Art task pane enables you to search for the type of picture you want, such as a flower, boat, or person. You enter a word or phrase describing the type of clip art you want, and Publisher by default searches for matches both in installed clip art and online. Follow these steps when you want to insert a clip art graphic into a publication:
1. | |
2. | Select Insert |
3. | Type the descriptive word or phrase in the Search For text box at the top of the pane; then, click Go. Thumbnail images of matching clip art appear in the task pane, as shown in Figure 31-18. Figure 31-18. Find and insert clip art using the Clip Art task pane.
Note The first time you search for clip art, a Microsoft Clip Organizer prompt asks whether you want to search online clips by default. Click Yes to do so. |
4. | Scroll down to review all the available choices. |
5. | Click the clip art media object to place on the publication. It appears on the page you specified in Step 1. You can then resize the picture as needed to fit with the other contents in your publication, and click outside the picture to deselect it. |

Changing a placeholder picture
Many publication templates include placeholder graphics that provide suggested sizes and locations where you can insert your own pictures or alternate clip art images. When you insert the replacement picture or clip art graphic, Publisher automatically resizes the replacement image to fit within the frame for the existing image.
To replace a placeholder image, right-click it to display a shortcut menu. (If the picture frame is grouped with a text frame for a caption, click the group first and then right-click the image.) Select Change Picture in the shortcut menu that appears and then select Clip Art or From File in the submenu that appears. From there, the process works just like the steps you’ve already learned for inserting a picture or clip art object.
Formatting pictures
You can adjust numerous settings to fine-tune a picture and its placement, including settings such as an added fill color or outline, size and rotation, layout and text wrapping, and brightness and contrast. The available settings vary somewhat depending on whether the selected picture is a digital image file or clip art graphic, and whether the picture is inserted on its own or is within a frame that’s grouped with other objects.
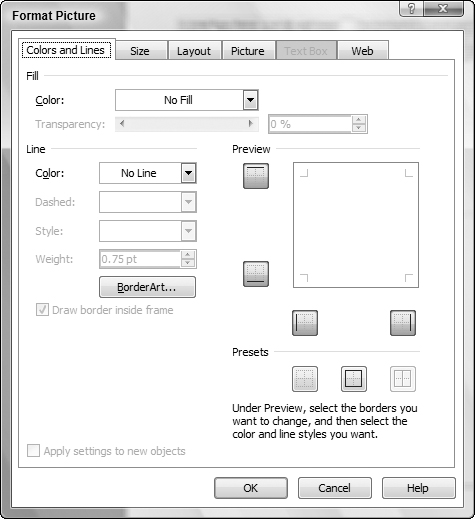
The settings for formatting a picture appear in the Format Picture dialog box. To display the dialog box, right-click the picture (click the grouped object first, if needed), and then select Format Picture. Change settings on the tabs in the Format Picture dialog box (Figure 31-19) as needed, and then click OK to apply your choices to the picture.
Figure 31-19. The tabs in this dialog box offer numerous settings for fine-tuning the appearance of a clip art object.
Tip
The green handle that appears at the top center of a selected picture, clip art object, or other drawn object is the rotation handle. Drag it to rotate the selected object.
Drawing lines and shapes
You also can enhance a publication by drawing shapes using the Line, Arrow, Oval, Rectangle, and AutoShapes buttons on the Objects toolbar. For example, you might draw an arrow to point to an important piece of information or draw a banner AutoShape to layer behind headline text.
To draw the shape, click the desired button on the Objects toolbar. If you click the AutoShapes button, a menu appears. Click a shape category in the menu and then click the specific AutoShape you want to draw in the submenu that appears, as shown in Figure 31-20.
Figure 31-20. You can select an AutoShape to draw from the AutoShapes tool.

After you’ve selected the desired line or shape, drag on the publication page to draw the object. Keep these hints in mind when you draw and work with shapes:
Drag in the desired direction to create a line or arrow. If you want to help the line snap to vertical, horizontal, or a 45-degree angle, press the Shift key when your line is close to the desired angle.
Drag diagonally to draw an oval, rectangle, or AutoShape. Press and hold Shift as you drag to constrain the shape to proportional dimensions; doing so results in a perfect circle or square, or an AutoShape that fits within a perfect circle or square.
After you draw an AutoShape, you can change it to another AutoShape by selecting Arrange
 Change AutoShape and then selecting the desired shape using the submenus that appear.
Some AutoShapes include a special yellow handle when selected. You can use this handle to reshape the object, such as dragging to increase the 3-D angle of the shape.
Right-click a shape and then select Format AutoShape to display the Format AutoShape dialog box, where you can change shape settings, as for a picture. One cool thing you can do is insert a picture within a shape or AutoShape. To do so, open the Color drop-down list in the Fill area of the Colors and Lines tab and then select Fill Effects. Click the Picture tab in the Fill Effects dialog box that appears and then use the Select Picture button to open the Select Picture dialog box. Navigate to and select the desired picture file, click Insert, and then click OK twice to fill the shape.