
Finding Program Options
You can adjust Office program settings such as how often the program saves AutoRecover information, where to save files by default, how certain elements look onscreen, and on and on. Each of the Office programs offers dozens of settings for changing program appearance and behavior.
Opening the Options dialog box
Each Office application gathers its settings in an Options dialog box. The top Office applications that use the new user interface—specifically Word, Excel, PowerPoint, and Access—introduce a new way of opening the Options dialog box. In these applications, you use the following method to open the Options dialog box (rather than use the Tools ![]() Options command):
Options command):
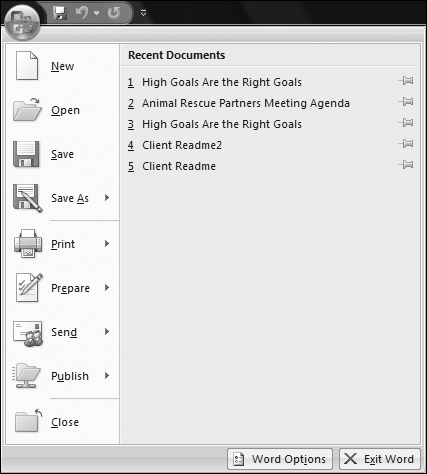
1. | Click the Office button. |
2. | Click the
Program Name
Options button. As shown in Figure A-1, this button is near the bottom right of the File menu. The button includes the name of the Office application that you’re working in. Figure A-1. Click the Program Name Options button near the bottom-right corner of the file menu to choose options.
|
Navigating in the dialog box
The left side of the Options dialog box lists the categories of available settings. Figure A-2 shows the Options dialog box for Word. To display the options in another category, click the category in the list at the left. For example, you click Save in the list shown in Figure A-2 to display Word’s saving options.
Figure A-2. The left side of the Options dialog box lists categories of options.

Tip
The Advanced category typically has an extensive list of options, so you can use the scroll bar at the right side of the dialog box to move down and find the options you need.
Note
You may see some slightly different options if you’re running Office on Windows XP rather than Windows Vista. For example, XP users see an Always Use ClearType checkbox in the Popular options category.