
Manipulation 101
Now that you’ve got those pictures, what are you going to do with them? Word 2007 provides a number of cool new tools that really expand your presentation options. What you can do with pictures depends on how they “live” in the Word document. We’ll look at the various wrapping options and their implications, and then move on to working with pictures, knowing that there are some constraints. Keep in mind also that this discussion is about working with Word 2007 format documents. If we were to deal with Word 97–2003 format, this book might need another 900 pages because the methods are so different.
Wrapping
Wrapping is the term used to classify the various ways in which pictures (as well as other graphics) are used in a Word document. It helps to understand that a Word document has several different layers. Where you normally compose text is called the text layer. There are also drawing layers that are both in front of and behind the text layer. A graphic inserted in front of the text layer will cover text up, unless the graphic is semi-transparent, in which case it will modify the view of the text. Graphics inserted behind the text layer act as a backdrop, or background, for the text.
Additionally, there is the header and footer layer. This is where headers and footers reside. This area is behind the text area. If you place a graphic into a header or footer, the graphic will appear behind the text. Dim graphics placed in the header/footer layer often serve as watermarks. Sometimes, the word CONFIDENTIAL will be used in the header/footer layer, branding each page of the document as a caution to readers.
Setting wrapping and wrapping defaults
Wrapping determines how graphics interact with each other and with text. Different wrapping settings are shown in Table 9-1. To set the wrapping behavior of a graphic, double-click it and then click the Wrapping tool in the Arrange group (in Picture Tools ![]() Format tab, or in the Page Layout tab). Choose the desired wrapping from the list shown.
Format tab, or in the Page Layout tab). Choose the desired wrapping from the list shown.
| Wrapping Setting | Effect/Application |
|---|---|
| In line with text | Inserted into text layer. Graphic can be dragged, but only from one paragraph marker to another. Typically used in simple presentations and formal reports. |
| Square | Creates a square “hole” in the text where the graphic is. Text wraps around the graphic, leaving a gap between the text and the graphic. The graphic can be dragged anywhere in the document. Typically used in newsletters and flyers with a fair amount of white space. |
| Tight | Effectively creates a “hole” in the text where the graphic is, the same shape as the overall outline of the graphic, so that text flows around the graphic. Wrapping points can be changed to reshape the “hole” that text flows around. The graphic can be dragged anywhere in the document. Typically used in denser publications in which paper space is at a premium, and where irregular shapes are acceptable and even desirable. |
| Behind text | Inserted into the bottom or back drawing layer of a document. The graphic can be dragged anywhere in the document. Typically used for watermarks and page background pictures. Text flows in front of the graphic. Also used when assembling a picture from different vector elements. |
| In front of text | Inserted into the top drawing layer of a document. The graphic can be dragged anywhere in the document. Text flows behind the graphic. Typically used only on top of other pictures or when assembling a vector drawing, or when you deliberately need to cover or veil text in some way to create a special effect. |
| Through | Text flows around the graphic’s wrapping points, which can be adjusted. Text is supposed to flow into any open areas of the graphic, but evidence that this actually works is in short supply. For all practical purposes, this appears to have the same effects and behavior as Tight wrapping. |
| Top and bottom | Effectively creates a rectangular hole the same width as the margin. Text flows above and below, but not beside, the graphic. The picture can be dragged anywhere in the document. Typically used when the graphic is the focal point of the text. |
You can also set the default wrapping. If you’re a long-time Word user, you likely already have a default wrapping style that suits your generic needs. If not, then in time you likely will find that you frequently change the wrapping from the default to something else. If that happens a lot, you can save yourself a step by setting the wrapping default to your usual setting.
To set the default wrapping style for most graphic objects you insert, paste, or create, choose Office Button ![]() Word Options
Word Options ![]() Advanced. In the Cut, Copy, and Paste section, use Insert/Paste Pictures As to set wrapping to any of the options shown in Figure 9-34. This setting determines the default for most, but not all, graphics inserted into Word.
Advanced. In the Cut, Copy, and Paste section, use Insert/Paste Pictures As to set wrapping to any of the options shown in Figure 9-34. This setting determines the default for most, but not all, graphics inserted into Word.
Figure 9-34. Wrapping behavior determines what you can do with a picture in Word.

Notable exceptions are Shapes (the leftmost group in the Insert tab) and Text Boxes. Shapes and Text Boxes can be set to any wrapping style after the fact, but they are always inserted as In Front of Text. Another exception, of sorts, stems from the fact that if you copy a picture from one part of a document and paste it elsewhere, then it will inherit the wrapping style of the original picture and won’t use your default.
Knowing how you plan to use a picture and what you need to do to it should determine the wrapping setting. Wrapping effects and typical uses are shown in Table 9-1. Wrapping comes in two basic flavors: in line with text and floating. Floating means that the picture can be dragged anywhere in the document and isn’t constrained in the way that in line with text graphics are.
Changing Wrap Points
For Tight and Through wrapping, you can change the wrap points. To edit the wrap points, click the picture (you might need to click twice), and then choose Text Wrapping ![]() Edit Wrap Points from the Arrange group in the Picture Tools
Edit Wrap Points from the Arrange group in the Picture Tools ![]() Format tab, or from the Arrange group in the Page Layout tab, as shown in Figure 9-35. If too much white space is showing, you can reduce it by moving the wrap points closer to the object. If you want a special effect by creating a starburst or other pattern, you can drag the wrap points outward and inward.
Format tab, or from the Arrange group in the Page Layout tab, as shown in Figure 9-35. If too much white space is showing, you can reduce it by moving the wrap points closer to the object. If you want a special effect by creating a starburst or other pattern, you can drag the wrap points outward and inward.
Figure 9-35. Use Edit Wrap Points to change the way text flows around a picture.

Dragging and nudging
You can move any graphic by dragging it, and some graphics can be dropped anywhere in the document. Graphics inserted as In Line with Text, however, can be dropped only at a paragraph mark. All other graphics can be dragged and dropped anywhere. The techniques described in this section apply only to floating graphics (i.e., not In Line with Text). As described earlier, what happens when you drag a graphic is determined by the wrapping that is applied.
To drag a graphic, click to select it, and then drag it where you want it to go. You can also nudge a selected floating graphic. Select it, and then use the cursor keys to nudge it in any of the four directions.
To drag in discrete steps using Word’s built-in invisible drawing grid, hold the Alt key as you drag. If you make Word’s gridlines visible (View ![]() Gridlines), however, the effect of the Alt key is reversed. Now, holding Alt while dragging ignores the grid, shown in Figure 9-36. With the grid displayed, cursor key nudging also changes. Now, the cursor keys move the picture in grid steps. Press the Ctrl key to nudge in smaller gradations. Each grid mark is ⅛ of an inch.
Gridlines), however, the effect of the Alt key is reversed. Now, holding Alt while dragging ignores the grid, shown in Figure 9-36. With the grid displayed, cursor key nudging also changes. Now, the cursor keys move the picture in grid steps. Press the Ctrl key to nudge in smaller gradations. Each grid mark is ⅛ of an inch.
Figure 9-36. Enable Gridlines in the View Ribbon for help in planning graphic placement.

Note that gridlines is a Wordwide display setting. If you have other documents open in the same Word session, they too will be gridded. Waffles, anyone?
Resizing and cropping
Resizing changes the physical dimensions of the picture as it is displayed in your document. Resizing in Word will not make the associated file (or the image stored in the .docx file) any larger or smaller. If you make it smaller and then later make it larger, you still retain the original file resolution.
Cropping refers to blocking out certain portions of a picture by changing its exterior borders. You can crop out distracting or unnecessary details. Again, cropping in Word does not affect the actual picture itself, only the way it is displayed in Word. The fact that Word doesn’t change the actual image is a big plus, because you preserve your options if you later change your mind.
Caution
Resizing and cropping in Microsoft Picture Manager and other graphics programs does change the picture itself. Keep this distinction in mind. Once you’ve saved a cropped or resized picture in Picture Manager, you can’t get the original back (unless you saved a backup copy, of course).
Resizing
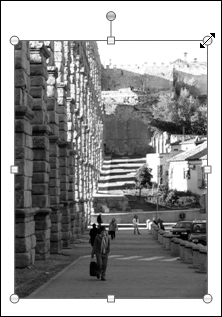
You can resize a picture by typing the measurements or by dragging. To resize by dragging, click on the picture and then move the mouse pointer so that it’s over one of the eight sizing handles. The mouse pointer changes into a double arrow, as shown in Figure 9-37. Drag until the picture is the desired size and then release the mouse button. Note that dragging the corner handles maintains the aspect ratio of the picture, while dragging the side handles can be used to stretch or compress the picture.
Figure 9-37. Resize a picture or other graphic by dragging any of the eight sizing handles.
Hold down the Ctrl and/or Alt keys while dragging to modify the way resizing occurs:
To resize symmetrically, causing the picture to increase or decrease by the same amount in opposite directions, hold down the Ctrl key while dragging.
To drag in discrete steps, hold down the Alt key while dragging; if gridlines are displayed, the Alt key’s behavior is reversed, as indicated earlier.
You can combine these options. For example, holding down the Alt and Ctrl keys at the same time forces Word to resize in discrete steps while resizing symmetrically.
Note
Use the solitary green handle above the center of the picture to rotate the picture.
To specify the size of the picture exactly, click in the Height and/or Width boxes in the Size group in the Picture Tools ![]() Format tab. By default, these settings maintain the aspect ratio automatically. To distort the picture, click the Size dialog box launcher in the Size group. Remove the check next to Lock aspect ratio, as shown in Figure 9-38. The Alt Text tab in the Size dialog box is for specifying descriptive alternative text to be displayed in a browser if the picture is not available or the user has disabled displaying pictures.
Format tab. By default, these settings maintain the aspect ratio automatically. To distort the picture, click the Size dialog box launcher in the Size group. Remove the check next to Lock aspect ratio, as shown in Figure 9-38. The Alt Text tab in the Size dialog box is for specifying descriptive alternative text to be displayed in a browser if the picture is not available or the user has disabled displaying pictures.
Figure 9-38. Lock aspect ratio is enabled by default; to distort a picture’s dimensions, turn it off.

Cropping
To crop a picture, click the Crop button in the Size group in the Picture Tools ![]() Format tab, shown in Figure 9-39. The selected picture sprouts cropping handles, as does the mouse pointer. Move the pointer over any of the eight cropping handles and drag to remove the part of the picture you want to hide. Note that the Alt key crops in discrete steps. You can also crop using the Size dialog box, as shown in Figure 9-38.
Format tab, shown in Figure 9-39. The selected picture sprouts cropping handles, as does the mouse pointer. Move the pointer over any of the eight cropping handles and drag to remove the part of the picture you want to hide. Note that the Alt key crops in discrete steps. You can also crop using the Size dialog box, as shown in Figure 9-38.
Figure 9-39. Crop to hide part of a picture to focus the reader’s attention.

Picture Styles
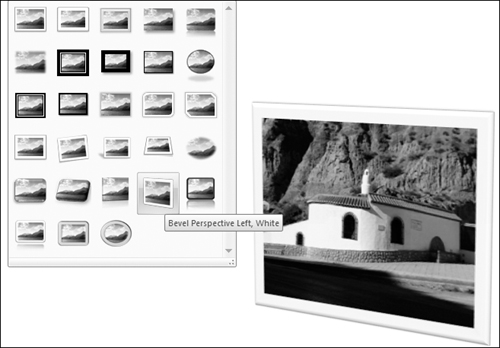
Word 2007 provides a variety of tools for controlling the presentation of graphics. To the extent possible, use the Ribbon to apply the basic effects, then use additional tools to refine the effect for more precision, if needed. The Picture Styles Gallery provides a variety of different presentation styles. Double-click a picture to activate the Picture Tools ![]() Format tab. In the Picture Styles group, shown in Figure 9-40, click the More tool to expose more of the gallery.
Format tab. In the Picture Styles group, shown in Figure 9-40, click the More tool to expose more of the gallery.
Figure 9-40. Picture Styles are previewed in your document when you move the mouse.

As shown in Figure 9-41, when you move the mouse, each style is applied to the selected picture (or pictures). Note that the speed of Live Preview is heavily affected by the size of the graphic file. If the picture is 2MB, then Live Preview is going to be a lot slower than if the file is only 50K in size.
Picture Effects
Additional effects can be applied and refined using the Picture Effects tool, also contained in the Picture Styles group. There literally are millions of different permutations of effects you can apply, a small sampling of which is shown in Figure 9-42. Take a few years off to explore the different combinations.
Figure 9-42. Applying multiple picture effects and Picture Style Gallery choices provides myriad combinations of formatting.

Format picture/shape
You can hone many picture styles and effects using the Format Picture/Format Shape dialog box. Like many other picture tools, although this is a dialog box, it nonetheless features Live Preview of effects. To display the Format Picture/Shape dialog box, right-click on a picture or shape and choose Format Picture or Format Shape. The Format Picture/Format Shape dialog box, which does duty for a variety of different graphic types, is displayed, like the one shown in Figure 9-43. If you’ve applied formatting using the other style implements, you can hone those effects here.
Figure 9-43. Refine your pictures further using the Format Shape (Picture) tool set.

Adjust
Word also features six tools for adjusting picture attributes, shown in Figure 9-40. Use the tools to accomplish a number of common tasks:
Brightness and Contrast— Tweak images for better printing or onscreen presentation (Live Preview).
Recolor— Apply different color masks to achieve antiquing, sepia tone, grayscale, and a variety of other color effects (Live Preview).
Compress Pictures— Reduce the size of the picture stored in the file to the minimum needed for a given application.
Change Picture— Replace the picture with a different one. Picture Style and Effects applied carry over to the replacement picture, as do changes applied using other tools in the Adjust group. Cropping and resizing, however, do not.
Reset Picture— Removes formatting applied using Picture Styles, Picture Effects, and other Adjust tools (except for Change and Compress).
Arranging pictures on the page
Word has additional tools for quickly controlling the position of pictures, both two-dimensionally on the document page, as well as with respect to other objects in the graphical layer. In the Arrange group (see Figure 9-40), click Position. Shown in Figure 9-44, In Line with Text is identical to the In Line with Text option listed under Text Wrapping. The other options, however, aren’t duplicated elsewhere, except indirectly through use of the Advanced Layout dialog box.
Figure 9-44. Position gives you a Live Preview of nine fixed positions.

Some pictures need to be in a particular location in order to make sense. In laying out newsletters, brochures, and many other publications, however, some pictures are intended as general illustrations. Position on the page can be decided on the basis of aesthetics and balance rather than purely on logic and the relationship between a given picture and a particular passage in the text.
The More Layout Options invokes the Advanced Layout dialog box, shown in Figure 9-45. Users of earlier versions of Word will recognize this as the result of clicking the Advanced button in the Layout tab of the Format Picture dialog box. The settings shown here correspond to the center position available in the preset positions (absolute center of the page both vertically and horizontally).
Figure 9-45. Advanced Layout enables you to precisely control and set the position of graphics on the page.

Additional options of interest include the following:
Move object with text— Associates a picture with a particular paragraph so that the paragraph and the picture will always appear on the same page. This setting affects only vertical position on the page. Although Word will allow you to check this option and Lock anchor at the same time in the dialog box, once you click OK, the Move object with text option is cleared.
Lock anchor— This setting locks the picture’s current position on the page. If you have trouble dragging a picture, verify that it is set to one of the floating wrapping options (anything but In Line), and that Lock anchor is turned off. Pictures that have been positioned using the nine Position presets will also resist dragging.
Allow overlap— Use this setting to allow graphical objects to cover each other up. One use for this is to create a stack of photographs or other objects. This feature is also needed in layered drawings.
Layout in table cell— This setting enables you to use tables for positioning graphics on the page.