
Auto-Scroll
During playback, the cursor can disappear off the right-hand side of the event display. Nuendo can be set to move the display in order to follow the cursor as it moves down the timeline. This is called Auto-Scroll and is easily turned on or off using the key command F or by clicking the Auto-Scroll button in the project window toolbar.
Note I think of this key command as “F for Follow the cursor,” where the display will actually follow the playback cursor as it moves through the project. This is a simple way for me to remember key commands although this one gets used about a million times a day and is more than memorized!
Since the F key is found just to the left of the G key, its choice as the key command for Auto-Scroll is no accident. The idea is that as you are zooming in and out, you can also quickly move the event display to where the cursor is currently located without taking your fingers off the G and H zoom commands.
Stationary Cursors
A feature that works in conjunction with Auto-Scroll is called stationary cursors. This preference is found again in the Transport pane of the Preferences window. When it is checked, the playback cursor will remain in the center of the event display during playback while Auto-Scroll is enabled. The event display itself will then move behind the cursor smoothly, as if the audio were being drawn across the cursor. I find this display to be the most helpful.
When stationary cursors is not checked, Auto-Scroll causes the event display to page over as the cursor moves down the timeline. I find that the paging over of the display is more disruptive because I am less aware of whether Auto-Scroll is active or not.
In conjunction, stationary cursors and Auto-Scroll provide an extremely fast and easy way to navigate a project while editing. Let’s try some examples of how this can work using the imported CD track in the earlier example. First, ensure that Stationary Cursors is checked and Return to Start Position on Stop is checked in Preferences and Auto-Scroll is off.
1. Start playback (spacebar).
2. Press H to zoom in. Notice that you will zoom in around the cursor.
3. When the cursor has left the event display, press F to start Auto-Scroll. The event display will jump to the cursor’s position, keeping the cursor in the center.
4. Press G to zoom out. Notice you will zoom out while staying centered on the cursor while it is still moving.
5. Press F again to stop Auto-Scroll. The event display stops moving and the cursor continues on.
6. Hit the spacebar to stop. The cursor will return to the start position, which might not be visible right now.
7. Press F. Even in stop, Auto-Scroll will snap the display to the cursor’s location.
The above example outlines some basic navigation techniques you can start with in order to develop your own style of working in Nuendo. This style of navigating will be used throughout the book, especially in Part III “Editing.”
For the next example, one more option will come in handy: Suspend Auto-Scroll when Editing. This option is enabled by clicking the tab just next to the Auto-Scroll button in the project window’s toolbar. (See Figure 5.6.)
Figure 5.6 Suspend Auto-Scroll when editing.
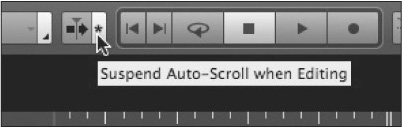
If you are using Auto-Scroll and you wish to edit something in the event display, this option temporarily disables Auto-Scroll after you click on an event. When you are using stationary cursors, this becomes necessary as editing a moving event is not much fun. Auto-Scroll returns upon the next playback.